If you missed the living room makeover, CLICK HERE to see part one photos and CLICK HERE to see part two photos.
After the living room floor was down, we continued through the opening into – what would be for normal people, the formal dining room – but for us is the game room, (or what the kids used to call the playroom when they were younger).
The game room got its own makeover back in September of 2009. You can CLICK HERE to see those before, during and after photos, but here’s one of the “after” photos that gives a frame of reference with regard to the opening connecting it to the living room.

And after the flooring in the living room was down, that opening looked like this:
(the navy blue curtains you see in the above photo are tied in a knot in the photos below)

Here’s a full shot of the opening from the game room side.

Ready? Here we go.
All the living room furniture that we had been storing in the family room while we were laying the living room flooring had to be moved OUT of the family room so we could store all the game room furniture in the family room while we laid the game room flooring.
Did you follow that?
Here’s what it looked like. Living room furniture in the in family room:

Game room furniture in the family room.

And a week later. Notice how much messier the family room looks after what at that point was over a month of continued home chaos. That’s paper shredder guts in the middle of the floor, but vacuuming just seemed so…pointless.

In the process, we had to unhook all the electronics and come face to face with the chord chaos we had been ignoring for…a long time.

What a mess.
Then I went to EPCOT.
Seriously.
I took PinkGirl to EPCOT and my FavoriteHusband and FavoriteSon tackled the game room floor prep while FavoriteHusband took breaks to hack my facebook and post photos of their progress.

Take note of that round appliance in the photo above.
It’s an air purifier.
We had three different ones running the entire time.
First the guys pulled up the old carpet and carpet pad. If you click to zoom and look closely, you’ll see some of the glued down carpet padding that FavoriteHusband and FavoriteSon meticulously scraped off the floor. By hand.

After the floor had been scraped, there was a fine layer of white powder EVERYwhere. On the walls, the curtains, the light bulbs…EVERYwhere. The air purifiers definitely helped. I took them apart to vacuum their filters. Here’s one mid-vacuum:

Then FavHubs ripped off all the old baseboards. They were those standard, boring baseboards and we had long since replaced them in the rest of the downstairs with 4.5 inch baseboards.

After scraping and vacuuming the floor, FavoriteHusband sealed it with Kilz.

Another reason I left the house that day. That stuff has a strong odor. Gives me a multi-hour headache.
After the sealer was dry, FavHubs cut and laid the plywood subfloor. (We had to lay a subfloor in the previously carpeted areas to raise the level up to meet the existing kitchen flooring – which we were not going to remove. The new flooring is a floating floor. We installed it right on top of the existing kitchen flooring. But that’s another post.)

Then I got back into the project. These planks have some STRONG adhesive on them, so we learned hard and fast that this job was going to go much more quickly and with less errors if we laid every single plank TOGETHER as a team.
I can’t believe, with as many photos as I took, I can’t find any of the flooring mid-install.
Here’s the end result:


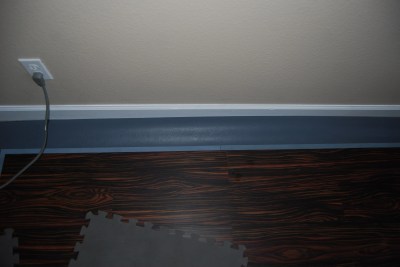
Then came the new baseboards. You remember that shot above showing the old baseboards mid-rip out? Here’s that same corner.

FavoriteHusband borrowed a miter saw and a compressor from a friend, watched a few youtube videos to learn how to use a coping saw and look at these beautiful baseboards!

Then I needed to mop it.
Or let my irobot Scooba mop it for me.

Here’s the nearly-finished room. Still have to finish the dreaded decorating.


I’ll post the kitchen photos soon. I hope.