I can’t believe how easy this is! What a GREAT idea for a dinner party. Easy, inexpensive, can be prepared ahead, and it looks decadently good. Watch what happens to the extra cake.
Check out more chocolate posts at “Would You Like Chocolate With That?” hosted by Lisa at Stop and Smell the Chocolates. Lisa’s Mr. Linky could use some more links – and it’s about CHOCOLATE, for cyrin out loud! So if you have any thing chocolaty to share, join me at “Would You Like Chocolate With That?” Don’t forget to check out past entries too!
Before I met FirstHusband, I had never heard of this product. Now, it’s the key ingredient to a standard recipe in our house. And the key component in the phenomenon of the disappearing carrots.
Here’s what we do:
1. Brown a roast (usually a chuck roast), put it in the bottom of the crock pot.
2. Top off the crock pot with peeled and cut potatoes on one side, baby carrots on the other.
3. Add water till it covers the carrots and potatoes.
4. Pour in Kitchen Bouquet until the water is . . . dark brown.
(sorry, I have NO measurement for you.)
5. Turn the crock pot on high for 4 to 5 hours.
6. Scoop out the potatoes into one bowl, the carrots into another and the roast onto a serving platter.
(we like our food separated. if you want vegetable chaos, mix them together, we don’t mind.)
7. Make some gravy with some of the broth. Save the rest of the broth for freezing.
8. Enjoy!
(There are never any leftover carrots. PinkGirl ate them like M&Ms on Monday night and asked for more on Tuesday. Luckily we have the leftover broth – cause THAT’s what makes the carrots so irresistible.)
My tip this week? Pick up a container of fat free vanilla yogurt at the grocery store! Then look for No Pudge Brownie mix! At my grocery store, it’s located in the health food section. The mix and the yogurt is all you need for a GREAT no fat brownie. My kids even love it!
These fudgy, chewy brownies were created by Lindsay Frucci, who calls herself a brownieholic. Back in 1995, she decided to see if she could come up with her own fat free brownie recipe. In the process, she “made and threw away more pans of brownies than most people make in a lifetime.” Her taste testers were the two builders who were remodeling her home at the time and they “took their mission very seriously, carefully evaluating every batch of fat free brownies for taste and texture.” By the time the remodeling was complete, she had her recipe!
A two inch square brownie has only 120 calories and NO FAT! Check out the No Pudge Frequently Asked Questions page for a single serving recipe and more info!
This is one of my favorite recipes. It takes a little more prep time than I usually like and about an hour to bake, but it is SO worth it!
I saw Paul James (aka “The Gardener Guy” on HGTV) prepare this on his cooking show (Home Grown Cooking) a few years ago and just had to try it. He called it “Fruit Stuffed Pork Roll” and the credits indicate the recipe was published in a book called “Classic Cooking With Pork: Over 100 Luscious Ways to Prepare the Other White Meat” by Philippe Molle in 1997, but Amazon shows it as “Classic Cooking With Pork: 100 Luscious Ways to Prepare Today’s Lean and Healthy Pork” and I didn’t see “Fruit Stuffed Pork Roll” in the table of contents, so it appears it was altered for the show. That is FINE with me. It turned out great!
We made two of these this weekend and I took some photos along the way. Check it out.
Ingredients:
3-1/2 lb. boneless pork loin roast, trimmed of excess fat
Salt and pepper to taste
Ground coriander to taste
1-1/2 cups assorted dried fruits, any variety, diced
1/3 cup apricot preserves
1 tsp. fresh ginger, minced (I use ground)
Pinch of red pepper flakes
1/4 cup dry white wine
1/4 cup chicken stock
3/4 cup heavy cream (I mix up non-dairy creamer according to the directions on the jar)
2 Tbs. whole-grain mustard (I use spicy brown mustard)
Butcher string
Directions:
First “butterfly” the roast. When you butterfly a roast, it’s a little different than when you butterfly a single serving size of meat, like a chicken breast. This requires two cuts. I tried to show it in the photos.
Here’s the roast before any cuts at all.
Starting about one third the depth of the meat, the first cut was made from right to left – but NOT all the way through. Then the newly cut “flap” was opened to toward the left, like it was on a hinge.
A second cut was made from left to right, starting at the hinge. Again, stopping before cutting all the way through, the flap was folded to the right on the hinge. As you can probably tell, the thickness of each section is determined by these cuts. Just try to keep it relatively even.
Both sides of the meat are sprinkled with the salt, pepper and coriander.
The fruit, apricot preserves, ginger and red pepper flakes are mixed together.
And the mixture is spread over the meat.
The meat is rolled up, tied with string and placed in a lightly greased baking pan (I spray it with Pam).
The original recipe calls for it to be baked for 35 to 40 minutes, but I’ve always had to cook it about an hour. I just use a meat thermometer and bake until the internal temperature (away from the fruit) reaches 160 degrees.
The roast is removed from the dish and set aside while the wine is added to the baking dish and a wooden spoon is used to scrape bits stuck to the dish. (I have never understood the need for a wooden spoon.)
(I stopped here and refrigerated the roasts and the liquid because it was late. I’ll finish up tomorrow and take more photos.)
The liquid is added to a small saucepan with chicken stock and brought to a boil over medium-high heat. After a few minutes, the cream and mustard are added and stirred to blend. The sauce will thicken after about 2 to 3 minutes.
To serve, remove string and slice pork. Top with sauce.
This dish is a staple in our fridge during the spring and summer.
Ingredients:
Cooked Rotini Pasta (I usually use tri-color)
Boiled Eggs (chopped, diced, sliced – whatever you prefer)
Manzanilla Green Olives with or without pimentos (whole, cut in half, chopped – whatever you prefer) Good Seasons Zesty Italian Dressing (it’s a mix packet, plus water, vinegar and canola oil)
(I don’t use olive oil because I found it changes the flavor too much)
Directions:
Boil eggs (Click HERE for egg boiling tips)
After eggs are boiled, I use the same pot to cook the pasta while I peel the eggs.
Cook pasta, rinse, let cool, rinse again (You don’t want it to be sticky)
In any order:
Mix Up the Salad Dressing According to Package Directions (You can add less oil if preferred)
Chop the Eggs as small or large as you prefer
Drain the olives and chop as small or large as you prefer
Transfer cooled, rinsed pasta to a container, pour dressing over it and mix thoroughly
Add boiled eggs and green olives and mix thoroughly
Chill and Serve!
Tips:
It really tastes MUCH better cold.
You may want to use more than one “bottle” of the dressing.
Sometimes I add chopped tomatoes.
I use a bowl with a lid so I can gently shake it to distribute the salad dressing. This way, I can store it in the fridge and flip it and shake it before I remove the lid.
I saw this recipe on another blog and I could NOT find it again! I looked through a bunch of Kitchen Tip Tuesday links, Works for Me Wednesday links, and a few recipe carnival links – no luck. Then, I walked away from the computer and actually made these WITHOUT a recipe! That is HUGE for me.
Ingredients:
1 package tortillas
1 can of refried beans
about a pound of ground beef
shredded cheddar cheese – at least 8 ounces
1 can of enchilada sauce
Directions:
Mix together the refried beans and the cooked ground beef.
Slather a couple spoonfuls onto the tortilla.
Sprinkle some shredded cheese on the bean/beef mixture.
Roll the tortillas and place in a baking pan.
Pour the enchilada sauce all over the rolled tortillas.
Sprinkle more cheese all over the top.
Bake at 350 degrees for about 20 minutes.
At the last minute, I remembered I had some corn on the cob in the fridge, which I steamed in the microwave for 8 minutes.
This meal is a hit with my entire family. Now we’re ready to start experimenting and modifying the base recipe. I already altered PinkGirl’s burrito a little bit. She doesn’t like sharp cheese or enchilada sauce, so I used a slice of American (torn in half) inside her burrito and nuked it for 30 seconds (without sauce).
It still bothered me that I couldn’t remember where I saw these originally. There were even step by step photos of the blogger’s husband preparing the meal. I sat back down at the computer and it hit me. The Google search string I needed:
wet burritos may 2008
FOUND IT! Thanks to Joy over at fiveJs for introducing us to wet burritos. We love them!
UPDATE: Thanks for the comments, Joy! And I’m going to try your recipe for homemade enchilada sauce!
Ingredients:
1 or 2 MorningStar Veggie Patties (depending on how hungry you are)
2 flour tortillas
1 t0 2 tbsp Hummus (my favorite is Sabra Supremely Spicy)
1 oz shredded cheese (my favorite is Cracker Barrel 2% Sharp White Cheddar)
a handful of shredded lettuce (or fresh spinach)
Directions:
On a small microwavable plate, nuke the MorningStar Patties for 1 minute.
Lay two tortillas side by side on a large microwavable plate.
Spread Hummus on each tortilla.
Add the shredded cheese.
Remove the cooked patties from microwave, cut into pieces and place on top of shredded cheese.
If desired, nuke for about 15 seconds to melt the cheese.
Add the lettuce and roll the tortillas.
DONE!
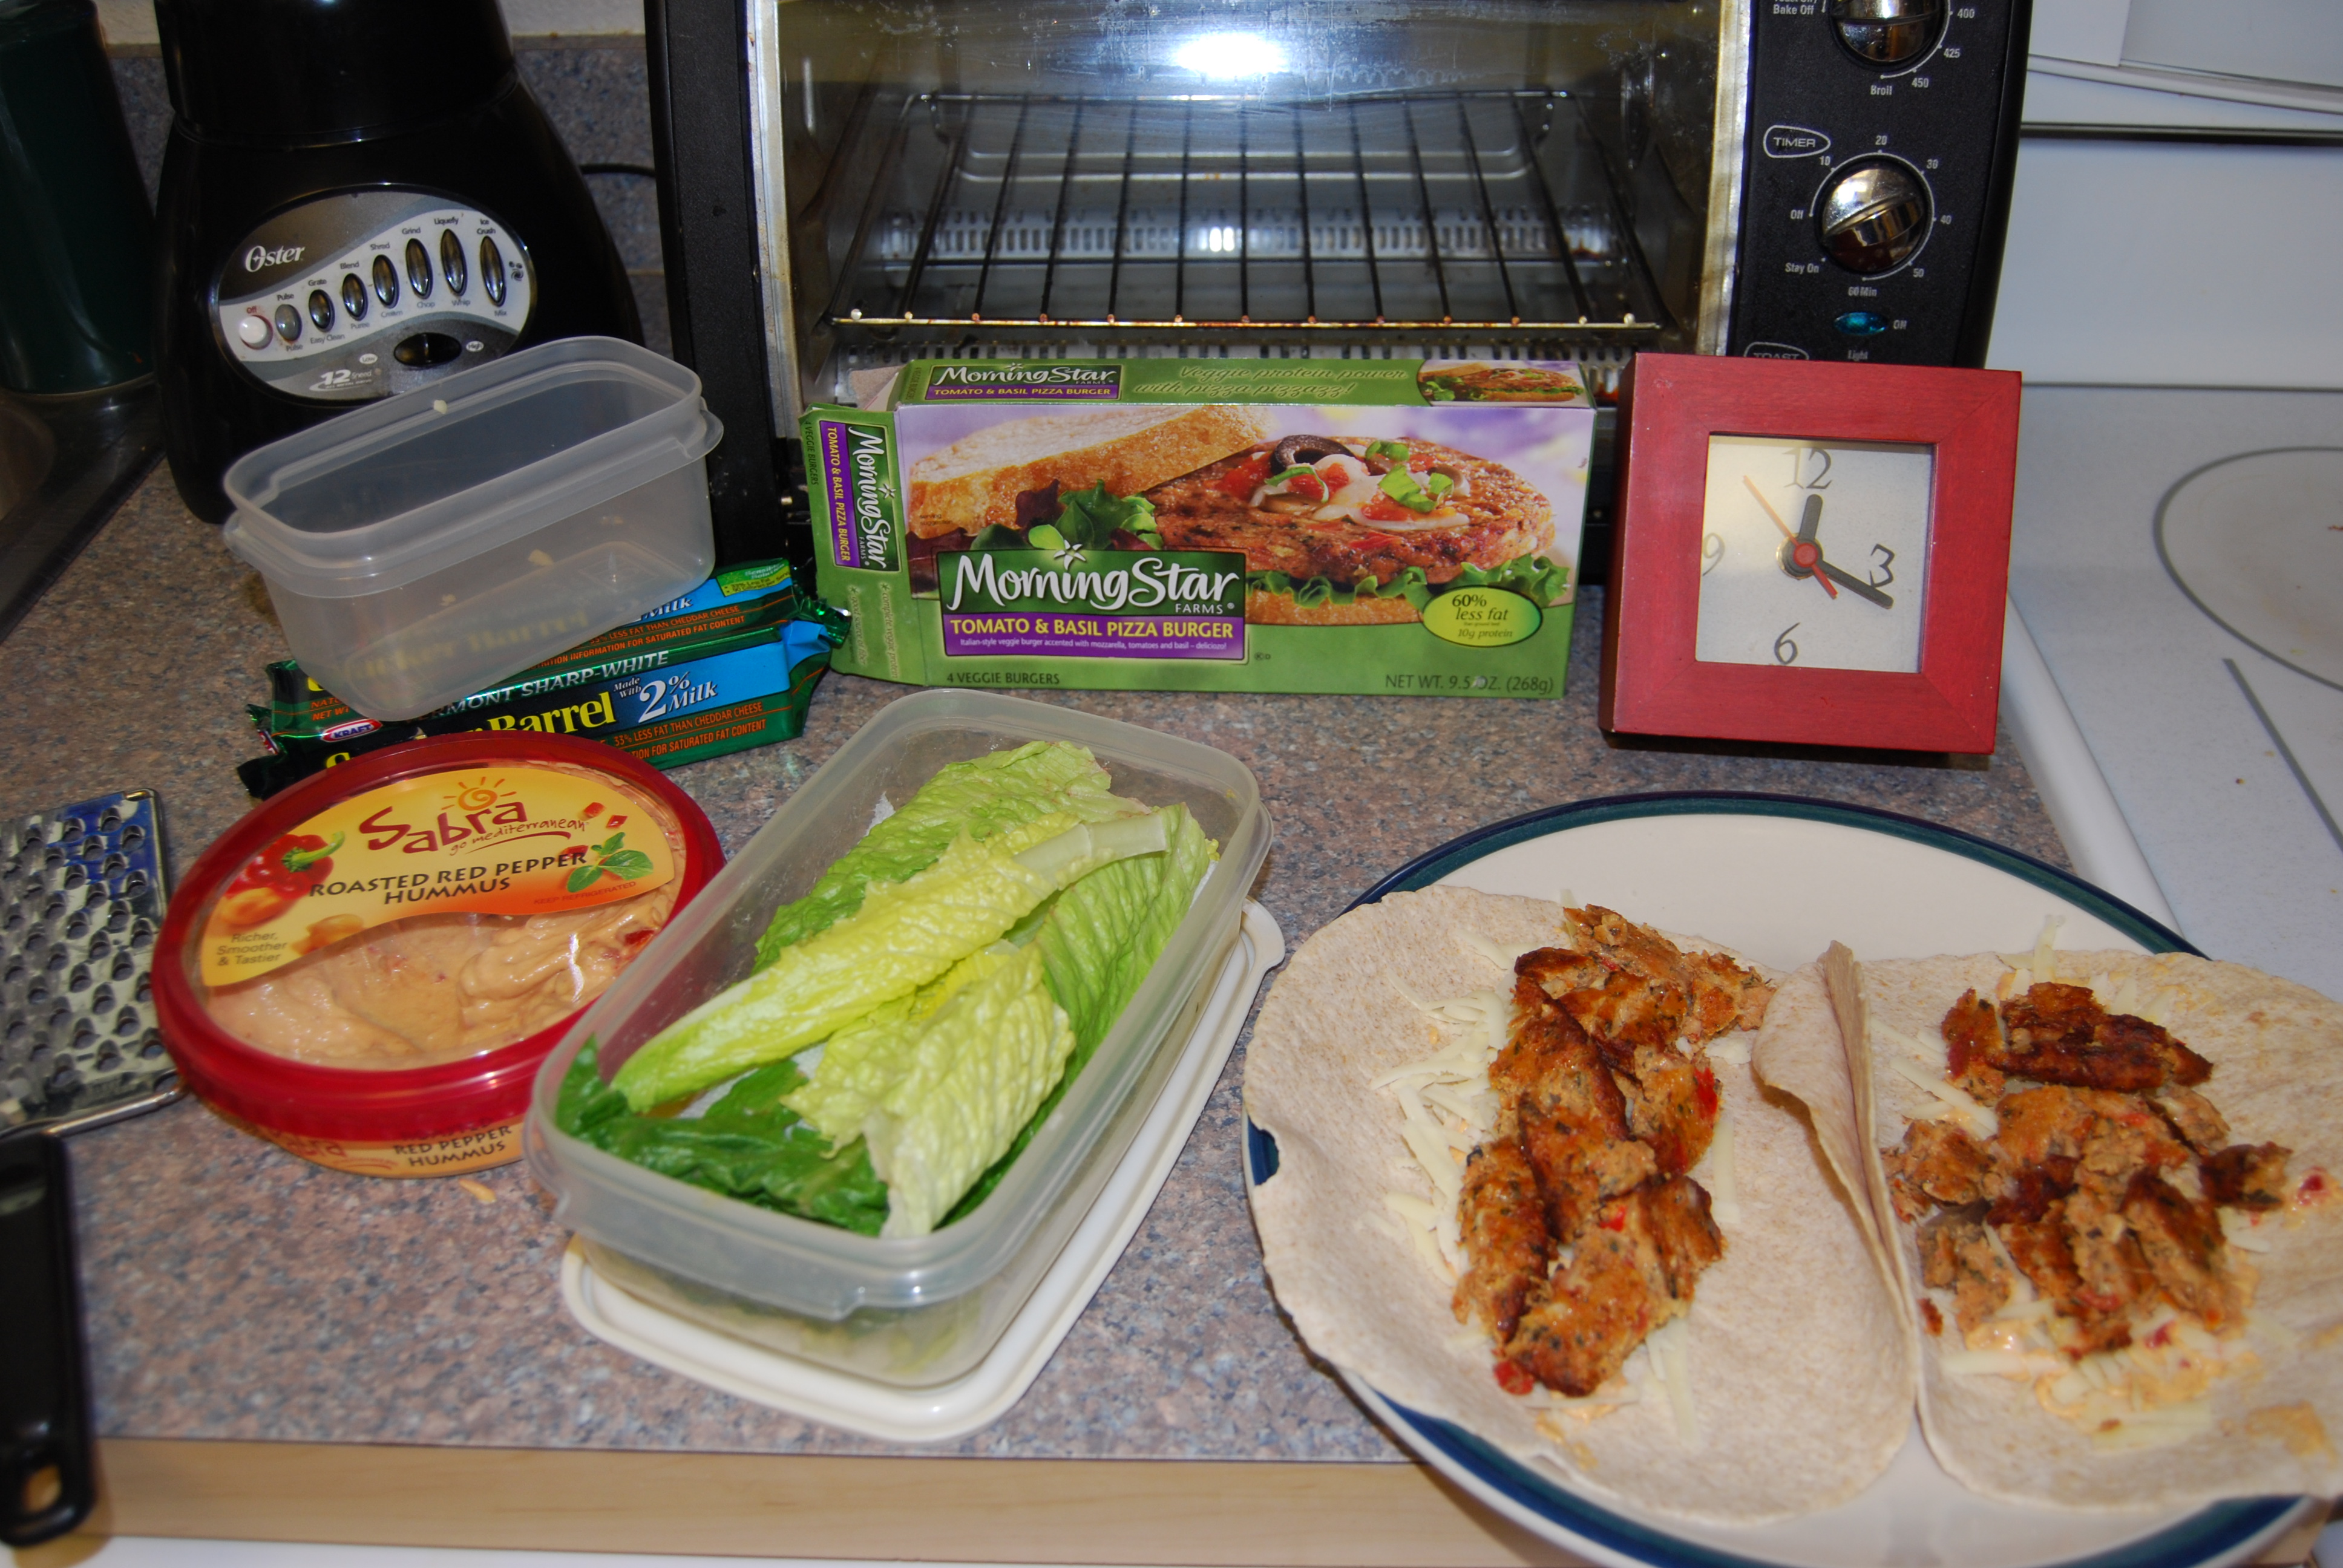
The last time I made these, I took some photos. Take a look!
Variations:
These photos show the Tomato and Basil Pizza Burger, but I my favorite is the MorningStar Black Bean patties. Use different flavors of hummus and cheese too. There are so many more combinations!
I LOVE Panera Bread Salads! I was quite distraught when the Orchard Harvest Salad (photo) disappeared from the menu. I’m hoping it will be back next winter.
These days I’m ordering the Fuji Apple Salad or the Fandango with chicken, neither one being my favorite. My FAVORITE summer salad is the Strawberry Poppyseed & Chicken Salad. (Ingredients and Nutritional Info)
Problem. These salads are too expensive to buy every day. And I kinda want one EVERY day. So . . .
I’m experimenting and making my own Panera Wannabe Salads! Here’s the latest version:
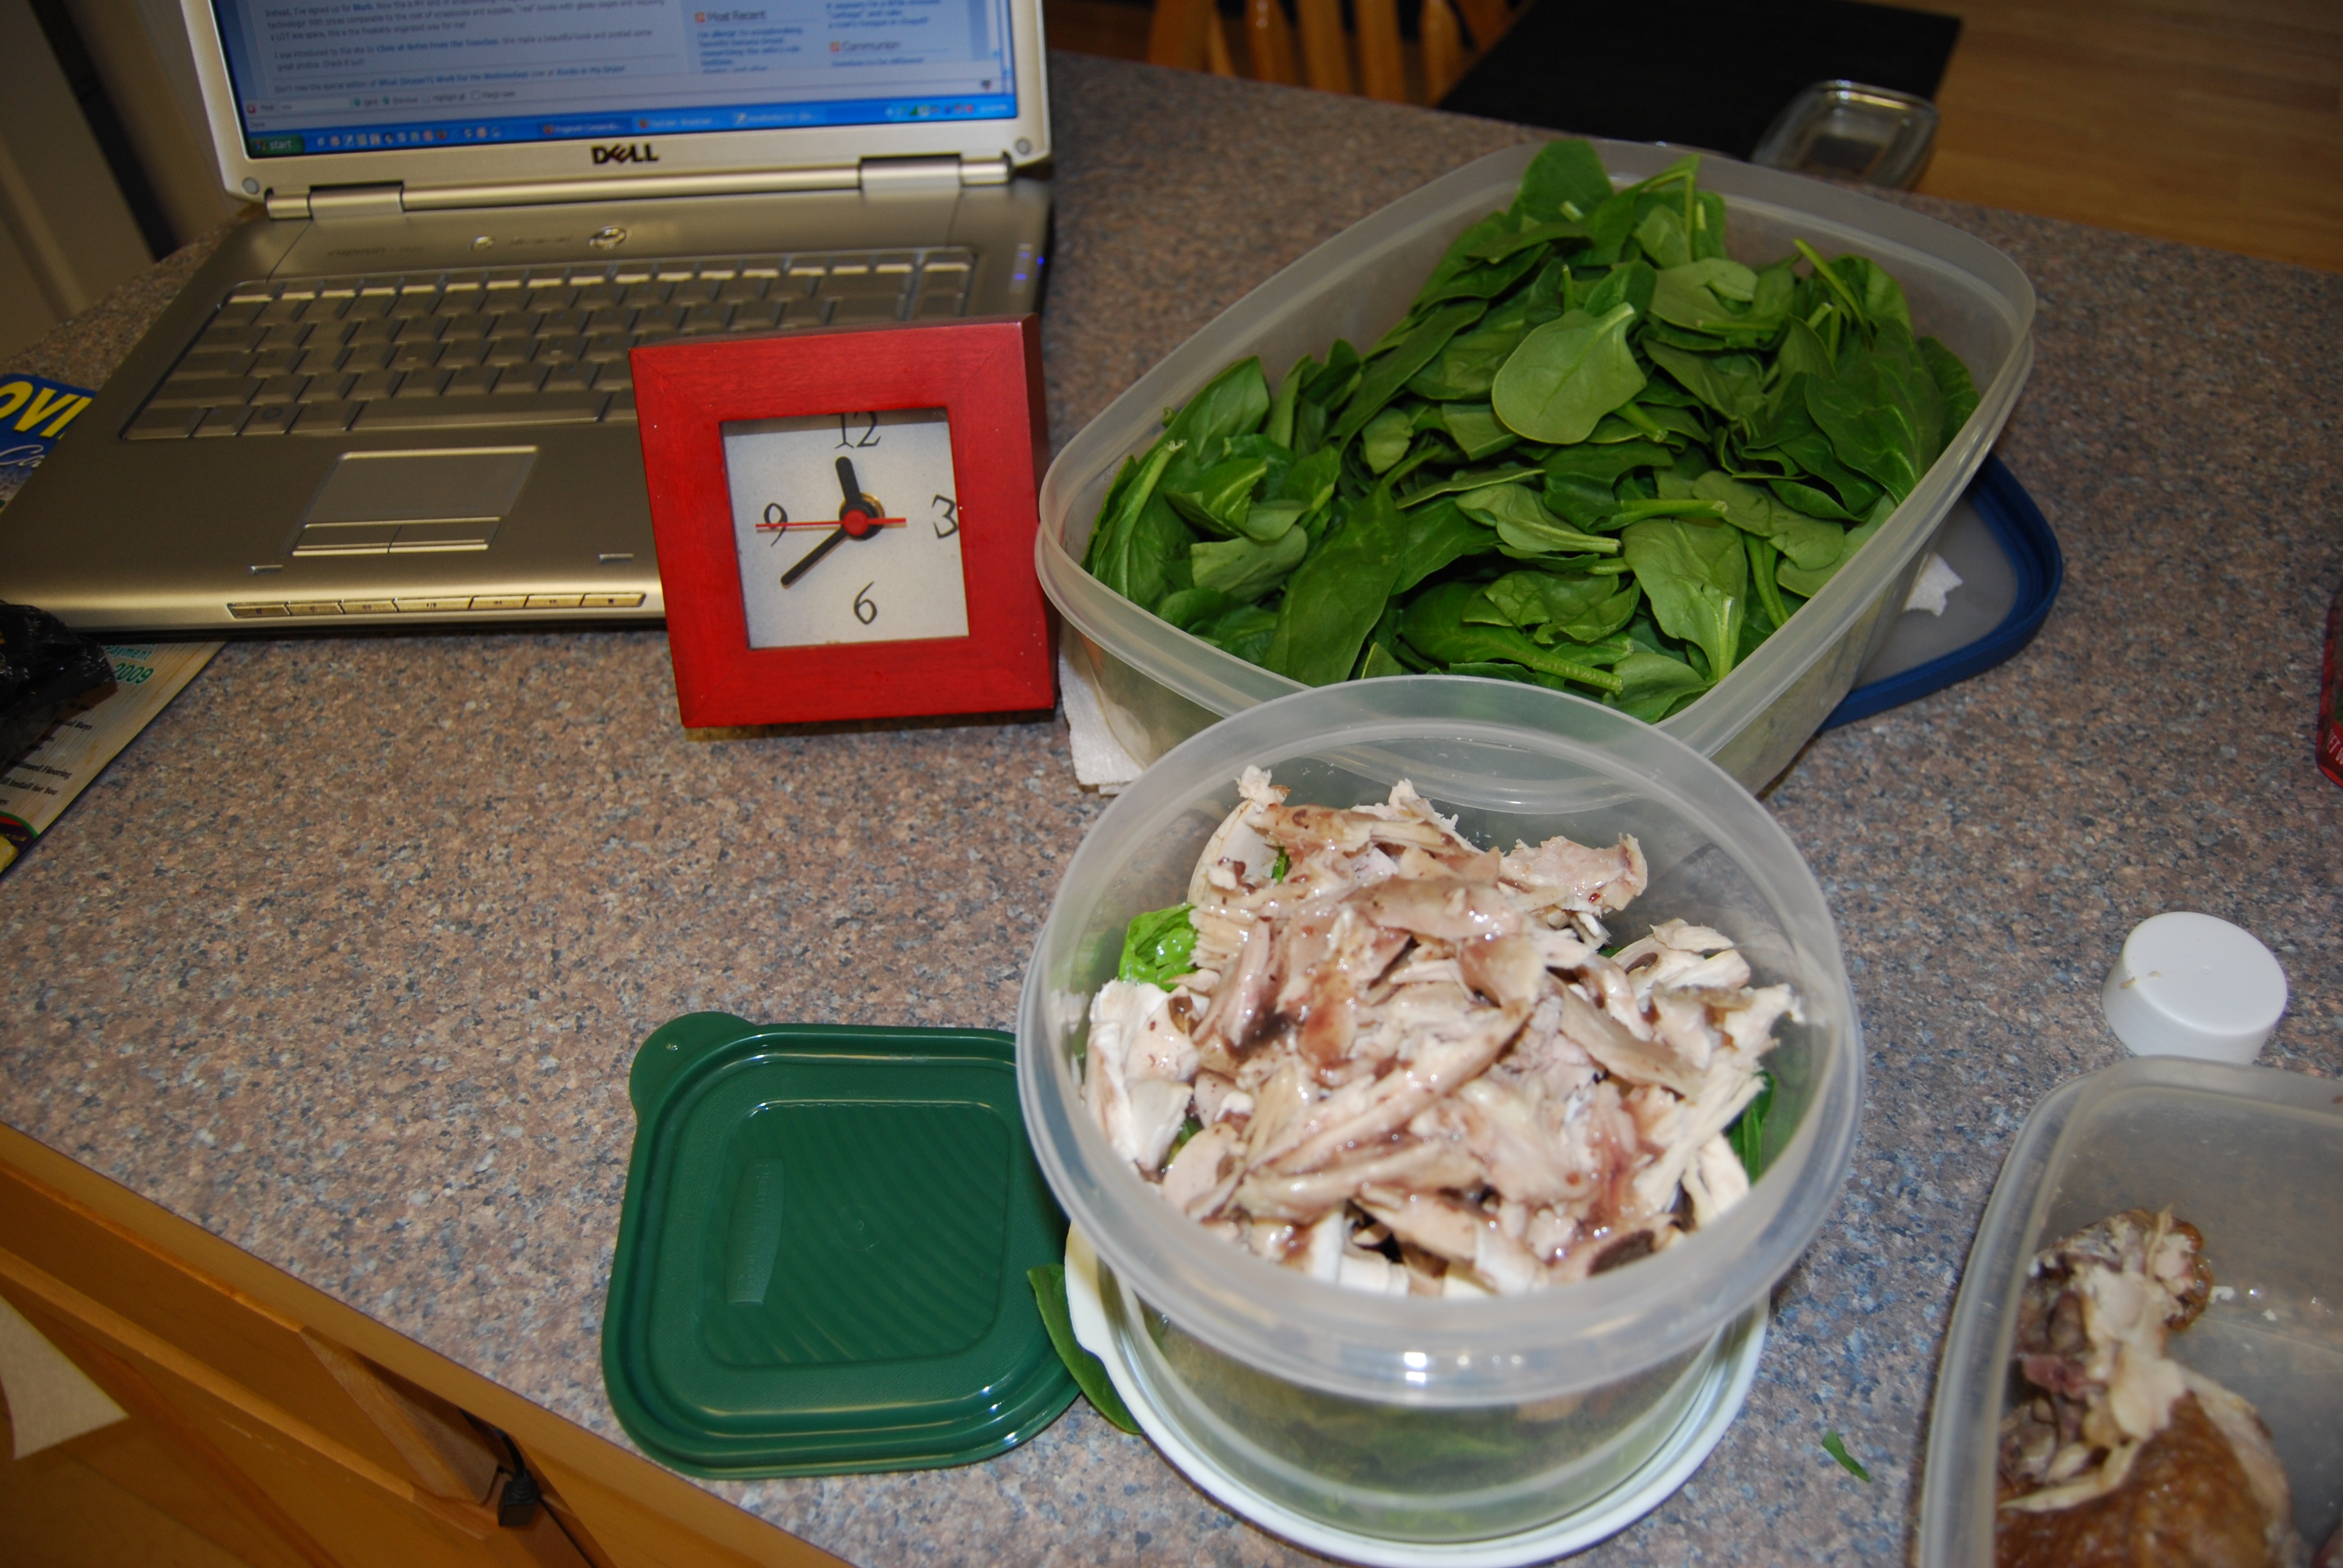
(Realize the “5 minute” part only works because I clean and prep veggies before I put them away. If I put shrink wrapped and unprepared veggies in the fridge right when I get home from the grocery store, I sacrifice them all to the mold gods a week later and give them an honorable burial in a big, black bag. I’ll write about it in more detail some other day (UPDATE: CLICK HERE for that post complete with photos), but what you see in the photo is a good representation of how I store veggies in the fridge. Notice all the containers filled with food are NOT round. I have an aversion to round containers for storage. They waste space! The round container is what I use as a salad shaker to completely coat my salad with a minimal amount of dressing.)
I just layer the salad ingredients in the round bowl. For this salad, I used:
Romain Lettuce
Fresh Spinach Leaves
Sliced Mushrooms
Pecans (small hand full)
Dried Cranberries (small hand full)
Cooked Chicken, torn from the bone (this was a Publix Deli Chicken – Apple Blossom Flavor)
Newman’s Own Light Raspberry and Walnut Vinaigrette
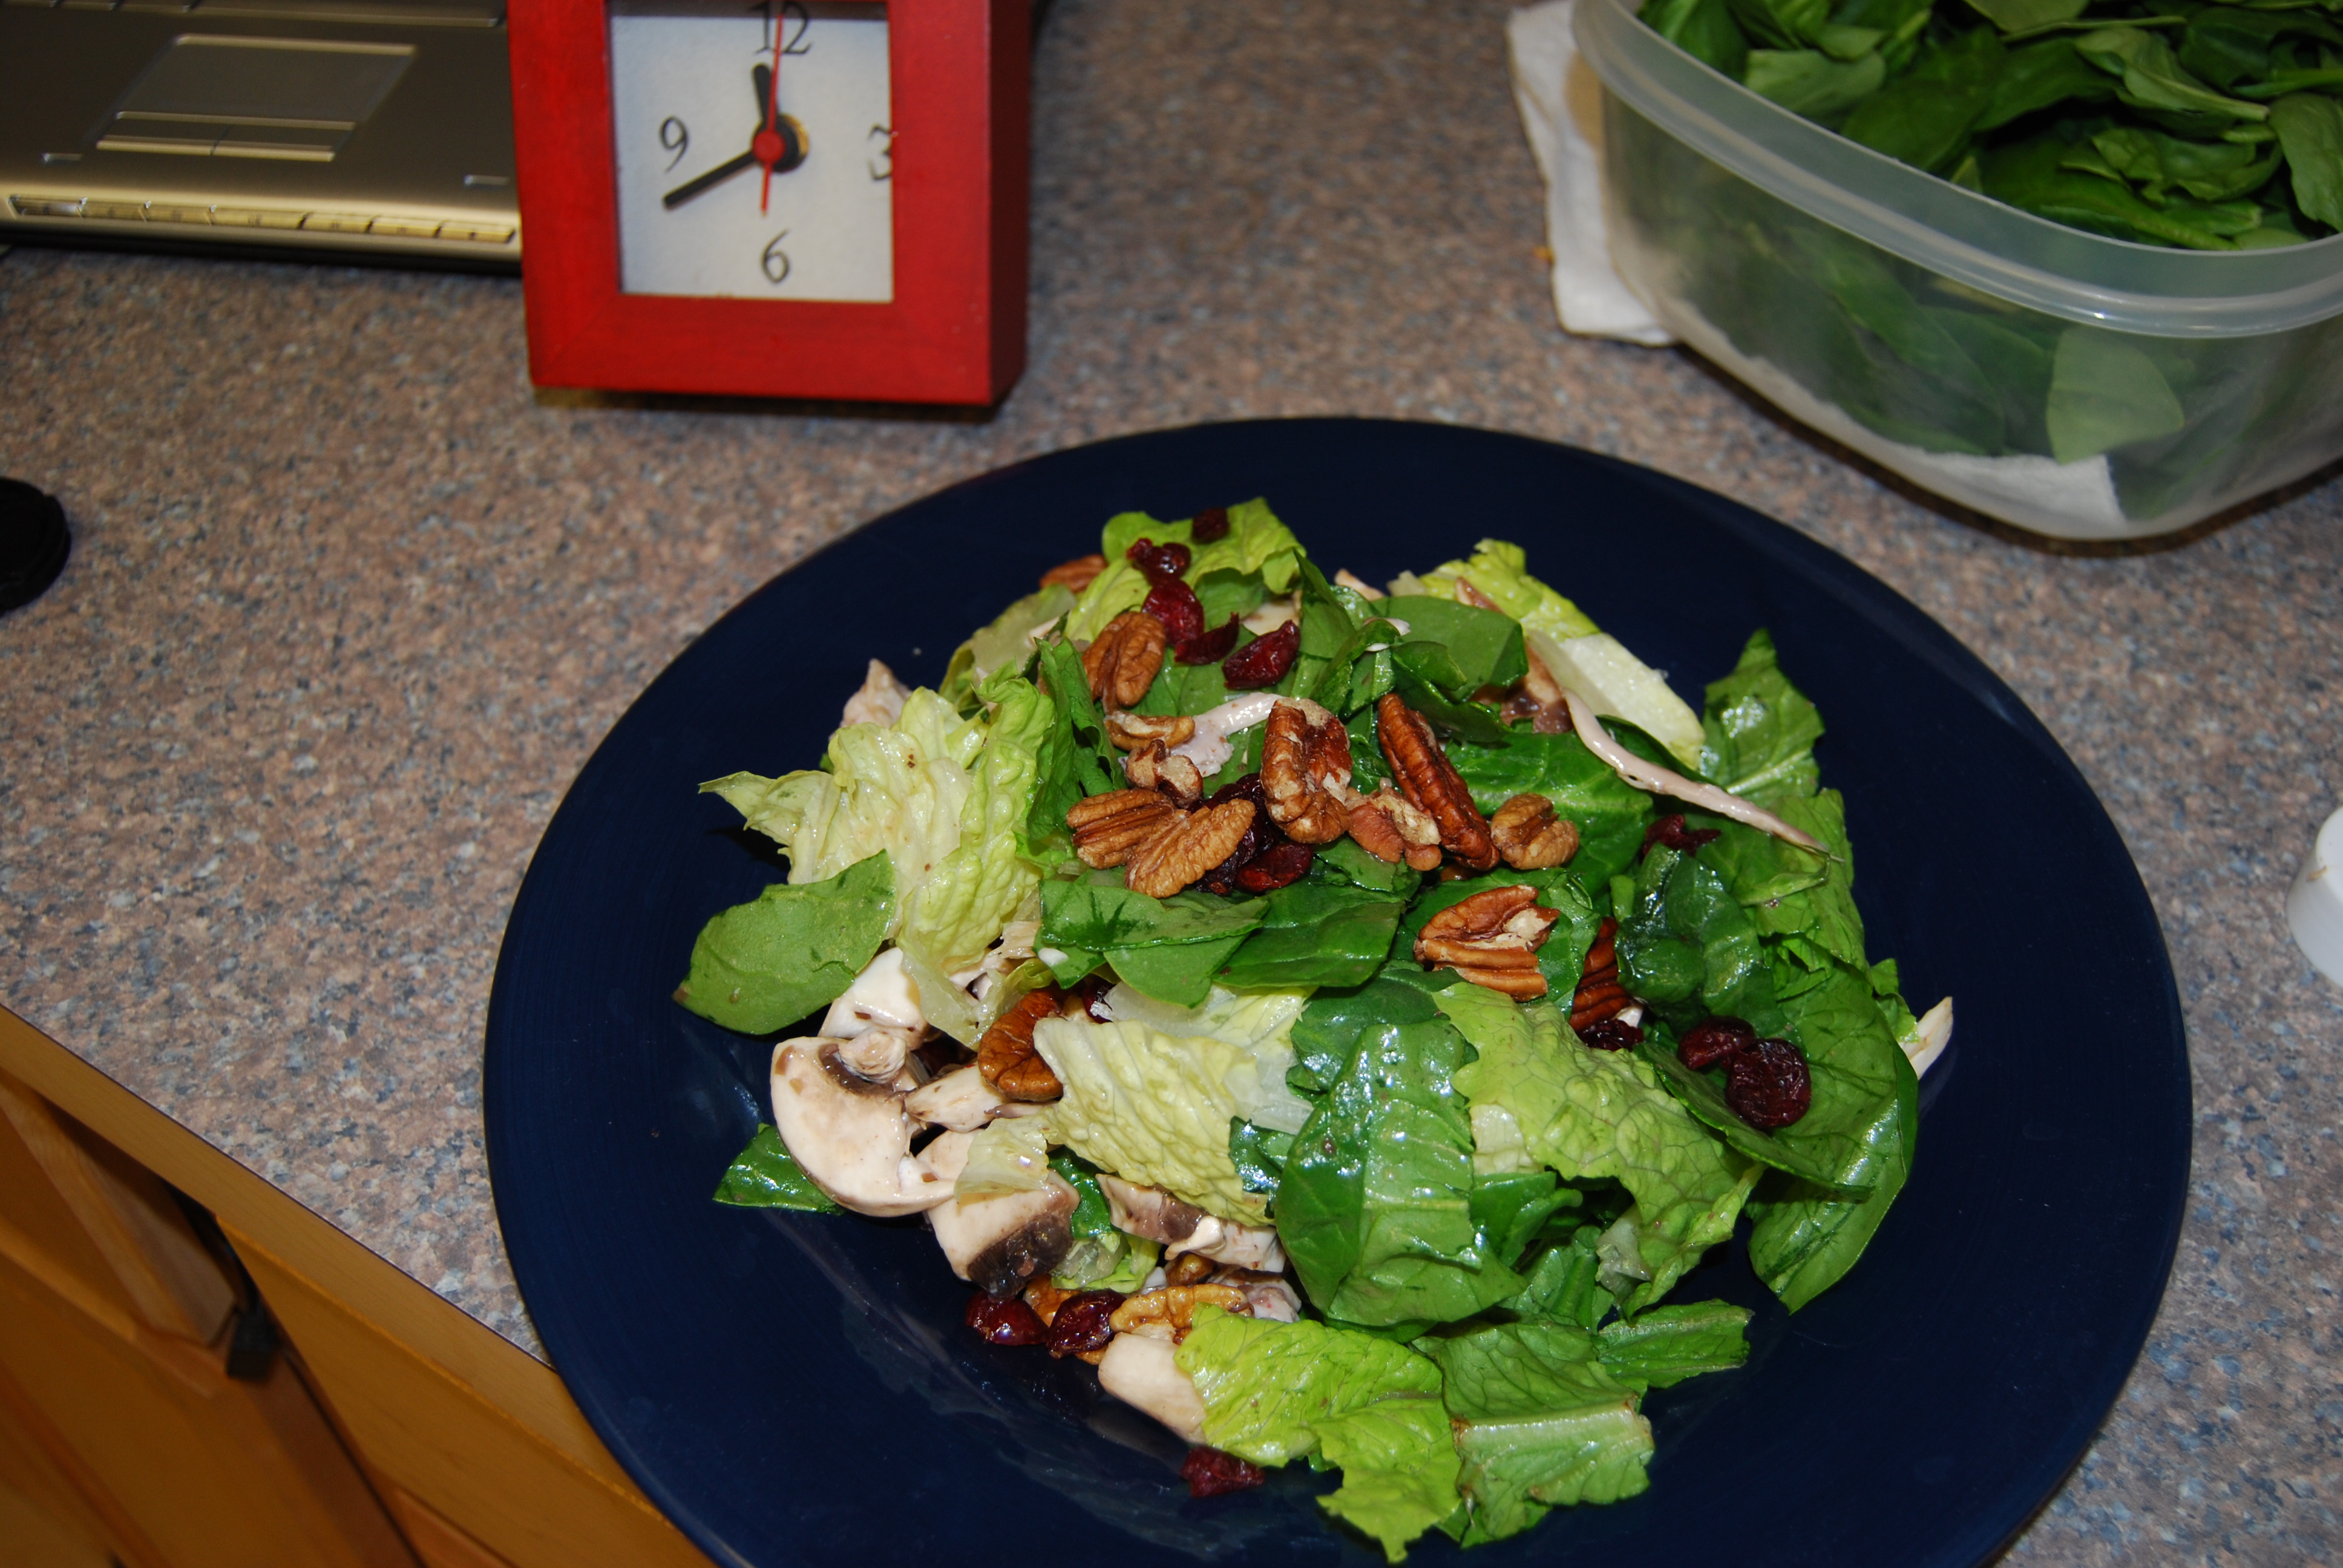
I put the lid on the round container and give it some serious shaking, take off the lid, put a pretty plate on top of the container and FLIP! (That’s why I use a round shaker.) Here’s what I got this time:
If you’re a guy, feel free to eat it directly out of the plastic bowl while leaning over the sink. 🙂
This week, the “Spring Mix” lettuce in a bag was on sale, buy one get one free, so I’ll definitely be inventing even more Wannabe Salads! And saving more money!
My kids LOVE this! (and have been nagging me to bake some for two days.)
Ingredients:
1 cup mashed ripe bananas (about 2 large)
1/2 cup sugar (I use half brown sugar)
1/3 cup liquid vegetable oil margarine (I use Smart Balance margarine)
2 egg whites
1/3 cup skim milk
1 1/4 cups all purpose flour (I use half whole wheat flour)
1 cup Quaker Oat Bran cereal, uncooked
2 teaspoons backing powder
1/2 teaspoon baking soda
Directions:
Heat oven to 350.
Spray loaf pan with cooking spray or oil lightly.
Combine bananas, sugar, margarine, egg whites and milk and mix well.
In a separate bowl, combine flour, oat bran, baking powder and baking soda.
Slowly pour dry ingredients into the banana mixture and stir just until moistened.
Pour batter into prepared pan.
Bake at 55 to 60 minutes or until toothpick inserted in center comes out clean.
Cool 10 minutes in the pan; remove to wire rack.
Cool completely.
Nutritional Info: (for 1/16 of a loaf)
(before my modifications to the recipe)
Calories 130
Protein 3 g
Carbohydrate 20 g
Fat 4 g
Fiber 1 g
Another tip? When bananas start to get soft in our house, I toss them into the freezer, skin and all. Then, when I make banana bread, I put the frozen bananas in a bowl and fill it with warm water a few times. When the bananas are thawed, I tear off the tip of the skin and “squeeze” the banana out like toothpaste. PERFECT for making banana bread and no wasted bananas!
I almost always make three or four loaves at one time. The mess is already there, the ingredients are already out and the oven is already hot – so why not? It freezes VERY well, sliced or whole!
I stumbled upon a recipe that turned out to be a REAL hit! So far, EVERYBODY I’ve shared this with has reported it a hit with even the pickiest eaters in their family. The fact that it took 5 minutes to prepare made it even better! Seriously. 5 minutes. (Click HERE for a modification we tried and LOVED)
Ingredients:
4-5 boneless (fresh, frozen or thawed) chicken breasts (we often buy frozen by the bag)
1 (15 1/2 ounce) can black beans (drained)
1 (15 ounce) can corn (drained)
1 (15 ounce) jar salsa, any kind
1 (8 ounce) package cream cheese
Directions:
Put the FROZEN (yes, FROZEN!) chicken breasts into the crockpot.
Pour in the (drained) black beans, the corn and the salsa.
Turn the Crockpot on high and walk away.
Come back in about 4-5 hours.
When it’s done, toss in the cream cheese and put the lid back on for 1/2 hour.
(The chicken is usually falling apart at this point, but I take two forks to it and shred it anyway. CLICK HERE if you don’t know how to shred meat.)
Done. Eaten. Gone.
UPDATE: A GREAT variation: I doubled the recipe except for the chicken and the cream cheese (I have a large crockpot). But this time, we rolled everything up in flour tortillas and made burritos! Next time I either need to use less salsa or maybe just take the lid off and let the mixture stand a little to thicken up, the burritos were a little too runny. But they were GOOD. It does take an extra few minutes to roll burritos after everything is cooked, but it’s still only 5 minutes to prepare on the front end!
FirstHusband and FavoriteSon both gave it two thumbs up. Over at www.recipezaar.com it has a total of 480 reviews with a total rating of 4 1/2 stars. Take a look at the reviews to see variations suggested by those who have tried it!
My other variations? I had to leave the house after two hours, so I cooked it 2 hours on high, 6 hours on low. I’ve never made it with fresh or thawed chicken breasts, so I don’t know how long it would take, but I’m thinking the LOW setting for sure.
Also, my serving didn’t have the cream cheese in it and I still liked it! The chicken was SO moist!




 ” and I didn’t see “Fruit Stuffed Pork Roll” in the table of contents, so it appears it was altered for the show. That is FINE with me. It turned out great!