I’ve mentioned before that we love watching MythBusters. And by “we” I mean FirstHusband, FavoriteSon, PinkGirl and myself. All of us. I even think the cats watch. I think they watch our MythBuster DVDs when we’re not home. Somebody is leaving them out of the case. Bob (a cat) looks guilty to me. Or maybe that’s just because of what he did to the carpet.
But I digress. MythBusters. Sneaky, fun education. We learn a LOT. (FirstHusband and FavoriteSon heckle a few things too.) In addition to the Mentos/Diet Coke phenomenon, one thing we’ve learned is how to take away “the burn” when eating spicy foods.
Milk.
FavoriteSon decided to perform his own test. He gathered up the bottles of hot sauce he got his dad for Christmas. (It’s a little game they play every year.) Bottles with names like “Smokin’ Toncils,” “Temporary Insanity” or “Blow Torch” on the labels. FavoriteSon picked a bottle and dipped a toothpick inside.
He popped the toothpick in his mouth.
Took the toothpick out.
Smiled.
Laughed.
And then grabbed his pre-prepared glass of milk. Then, wishing he had filled the glass, he left skid marks on the way back to the fridge for more.
But it worked.
A learning experience for him. Entertainment for the rest of us. The cats didn’t want to try it.
My tip this week? Pick up a container of fat free vanilla yogurt at the grocery store! Then look for No Pudge Brownie mix! At my grocery store, it’s located in the health food section. The mix and the yogurt is all you need for a GREAT no fat brownie. My kids even love it!
These fudgy, chewy brownies were created by Lindsay Frucci, who calls herself a brownieholic. Back in 1995, she decided to see if she could come up with her own fat free brownie recipe. In the process, she “made and threw away more pans of brownies than most people make in a lifetime.” Her taste testers were the two builders who were remodeling her home at the time and they “took their mission very seriously, carefully evaluating every batch of fat free brownies for taste and texture.” By the time the remodeling was complete, she had her recipe!
A two inch square brownie has only 120 calories and NO FAT! Check out the No Pudge Frequently Asked Questions page for a single serving recipe and more info!
This is one of my favorite recipes. It takes a little more prep time than I usually like and about an hour to bake, but it is SO worth it!
I saw Paul James (aka “The Gardener Guy” on HGTV) prepare this on his cooking show (Home Grown Cooking) a few years ago and just had to try it. He called it “Fruit Stuffed Pork Roll” and the credits indicate the recipe was published in a book called “Classic Cooking With Pork: Over 100 Luscious Ways to Prepare the Other White Meat” by Philippe Molle in 1997, but Amazon shows it as “Classic Cooking With Pork: 100 Luscious Ways to Prepare Today’s Lean and Healthy Pork” and I didn’t see “Fruit Stuffed Pork Roll” in the table of contents, so it appears it was altered for the show. That is FINE with me. It turned out great!
We made two of these this weekend and I took some photos along the way. Check it out.
Ingredients:
3-1/2 lb. boneless pork loin roast, trimmed of excess fat
Salt and pepper to taste
Ground coriander to taste
1-1/2 cups assorted dried fruits, any variety, diced
1/3 cup apricot preserves
1 tsp. fresh ginger, minced (I use ground)
Pinch of red pepper flakes
1/4 cup dry white wine
1/4 cup chicken stock
3/4 cup heavy cream (I mix up non-dairy creamer according to the directions on the jar)
2 Tbs. whole-grain mustard (I use spicy brown mustard)
Butcher string
Directions:
First “butterfly” the roast. When you butterfly a roast, it’s a little different than when you butterfly a single serving size of meat, like a chicken breast. This requires two cuts. I tried to show it in the photos.
Here’s the roast before any cuts at all.
Starting about one third the depth of the meat, the first cut was made from right to left – but NOT all the way through. Then the newly cut “flap” was opened to toward the left, like it was on a hinge.
A second cut was made from left to right, starting at the hinge. Again, stopping before cutting all the way through, the flap was folded to the right on the hinge. As you can probably tell, the thickness of each section is determined by these cuts. Just try to keep it relatively even.
Both sides of the meat are sprinkled with the salt, pepper and coriander.
The fruit, apricot preserves, ginger and red pepper flakes are mixed together.
And the mixture is spread over the meat.
The meat is rolled up, tied with string and placed in a lightly greased baking pan (I spray it with Pam).
The original recipe calls for it to be baked for 35 to 40 minutes, but I’ve always had to cook it about an hour. I just use a meat thermometer and bake until the internal temperature (away from the fruit) reaches 160 degrees.
The roast is removed from the dish and set aside while the wine is added to the baking dish and a wooden spoon is used to scrape bits stuck to the dish. (I have never understood the need for a wooden spoon.)
(I stopped here and refrigerated the roasts and the liquid because it was late. I’ll finish up tomorrow and take more photos.)
The liquid is added to a small saucepan with chicken stock and brought to a boil over medium-high heat. After a few minutes, the cream and mustard are added and stirred to blend. The sauce will thicken after about 2 to 3 minutes.
To serve, remove string and slice pork. Top with sauce.
Unfortunately, until a few years ago, my egg boiling skills were right in line with my sewing and skateboarding skills – non-existent. Besides the fact that they often had a gooey center, I – more often than not – ended up with the saddest, most pitiful deviled eggs I’ve ever seen. Then, one day, while (yet again) making egg salad after abandoning the impossible task of trying to get a lumpy, paper thin, shredded, boiled egg white half to hold deviled egg filling, I decided to Google the perfect boiled egg. (What did I do before Google?)
Here’s how I get “practically perfect” boiled eggs, every time. (“Mary Poppins. Practically perfect in every way.”)
1. Put the eggs on the bottom of a pan, in one layer.
2. Add enough water to completely cover the eggs, maybe about an inch over.
3. Add baking soda to the water (makes peeling easier)
4. Put the pan on a burner and turn it to medium-high heat.
5. Let the water come to a boil.
6. Put the lid on the pan when the water is boiling and move the pan onto a cold burner (oh, and you should probably turn off the hot burner).
(Now here’s where I mess up all the time.)
7. Set the timer for 15 minutes for Large-sized eggs (or for 12 minutes for Medium-sized eggs or for 18 minutes for Extra Large-sized eggs).
8. Put the pan in the sink when the timer goes off (or in my case, when I remember I have a pan of eggs on the stove).
9. Run cold water into the pan until the eggs are cool (I just run water until the water is cool).
And THIS is why I’m not embarrassed to serve deviled eggs to people outside my immediate family anymore:
10. I CHILL the eggs before I peel them. I put them in the fridge for 15 minutes. (Okay, so I put them in the fridge until I remember I have boiled eggs chilling in the fridge.)
11. Gently tap a cooled egg on a flat surface and then roll it until the larger cracks turn into tiny cracks all over the egg.
12. NOW peel the egg and rinse any tiny pieces of egg shell under running water.
Note: I only feed my disposal egg shells and potato skins when FirstHusband is in the mood to crawl under the sink and unclog it (that would be never).
I just can’t diet anymore. Can’t do it. All my life, I’ve been conscious of my weight. Whenever I’ve gone on a diet, it’s always been with a temporary mindset: “I’ll diet till I lose weight and then I won’t have to diet anymore.”
I need a more permanent solution. I need to change the way I eat. Not just temporarily, but for the long term. I need to teach my kids about health and nutrition – without warping their body image. I want to give every single person in my family the tools they need to make smart choices when it comes to the foods they eat.
To that end, I’ve been learning about nutrition and step by step, I’m incorporating what I’m learning into our family’s meals and snacks. I’ve also been sharing what I learn with my family, so we are ALL learning healthy, balanced eating habits together. When I say “we” I mean our entire family. Even 7 year old PinkGirl. We’ve been making small (but cumulative) changes in our eating habits for a few years now. It’s slow, but steady. Since we only incorporate one new change at a time, it’s been fairly painless. We also haven’t boycotted any particular foods, we just limit them if they are “less nutritious.”
Here are some of the microactions we’ve taken our our quest to eat better:
We Buy More Fruit and Make it Easy to Eat. Luckily, everyone in our family LOVES fruit. For the last few years, we’ve been buying MUCH more fruit. We tried blackberries for the first time last summer. (YUM) Some fruits are already easy to eat. Peel a banana, grab an apple, a nectarine, a bunch of grapes or a handful of cherries. Easy. But what about melon? One change we’ve made in our house is that we cut up melon and store it in Rubbermaid in the fridge. Now we don’t throw away a rotten melon two weeks after we bought it because no one took the time to cut it up. We actually EAT it because it’s ready to eat.
We Read Labels. We limit sodium, hydrogenated fats and especially high fructose corn syrup (which is in more foods than I ever thought possible). High fructose corn syrup can spike your blood sugar before you even swallow the food that contains it (well, almost). It’s even in bread. Even in “wheat” bread. We’ve learned that when the label on a loaf of bread says it contains “enriched” flour, it’s really just “brown” bread, not whole wheat bread. After reading e v e r y single label on e v e r y different kind of bread, we finally settled on Nature’s Own 100% Whole Wheat.
As we began reading labels, we began putting different things in our grocery cart. We now buy low sugar ketchup, Smart Balance peanut butter and margarine, Smucker’s Sugar Free Jam, and Barilla Multi-Grain Pasta. We make No-Pudge brownies (SO Good!). We’ve always made chocolate milk with Ovaltine instead of Hershey’s and most of the time, we have hummus and non-fat yogurt in the fridge. Juice? Only Tropicana Healthy Kids (1/2 cup serving) and a few boxes of Juicy Juice which we only use for emergency hypoglycemic melt-downs (quickly followed by a complex carb). Soda? Not so much.
We Eat More Lean Meats. We’re always on the lookout for tasty recipes. When we do eat ground beef, we buy 97% lean and rinse with hot water it in the sink to watch most of that leftover 3% fat go down the garbage disposal.
We Buy More Whole Grains. This one is easy. When we made the switch whole grains, nobody really noticed.
We Buy More Fresh and Frozen Veggies. We used to buy mostly canned veggies, and while we still do buy some, we buy a LOT more fresh produce than we used to buy. We’re working on making veggies more enticing for FavoriteSon. He would prefer to devour an entire pan of whole grain couscous or black beans and rice. His favorite is his dad’s special paella. Poor kid, he has no idea his dad adds pureed veggies to his favorite food.
So, all this said . . . I also allow “junk food” in the house.
I want to teach my kids balance. I remember how I responded to total restriction of junk food as a kid. I snuck food. Eventually, I even snuck food when I was the one restricting myself. I don’t want to risk the same reaction with my kids. I figure, there’s junk food in the world and I want them to make good choices all by themselves. I want to teach them about nutrition and give them the power to make their own choices (FirstHusband and I have veto power). My greatest victory so far? BOTH kids – after begging for a Chick-fil-A milkshakes – THREW THEM AWAY without drinking the entire thing. I asked them both, “Why?”
PinkGirl: “I’m full.”
FavoriteSon: “I don’t want anymore.”
YES!!!! It’s working!
So, the kids are allowed some junk food – IF they also eat the healthy food I ask them to eat. When they do eat junk food, they are required to stick to the suggested serving sizes and are limited as to how many times they can eat junk food in a day. Sometimes, like today, they don’t even ask for any “junk.” Sometimes they have it once in a day. Sometimes twice. Very, very rarely, three times in one day.
What do I consider junk food? Cereal for breakfast. Chips with lunch. Cookies for dessert. Candy. That kind of thing.
But I am their mother. And I’ve struggled with my weight for years. So, while teaching them (and myself) balance and allowing some treats, how do I make sure that when they go to get these treats, they will actually still be in the pantry? How do I make sure that I, myself, don’t treat myself in a moment of thoughtless munching? I remove temptation.
When I do buy junk food, I buy what I hate.
Here’ are some kid favorites that don’t tempt me one little bit:
Ranch flavored Doritos
Funions (oops. Spelled Funyuns)
Chewy Chips Ahoy (but I LOVE the regular Chips Ahoy)
Rainbow Chips Ahoy
Basically anything MILK chocolate (but I LOVE dark chocolate)
Easy Mac
Chef BoyRDee anything
Tom’s brand oven baked “Hot Fries”
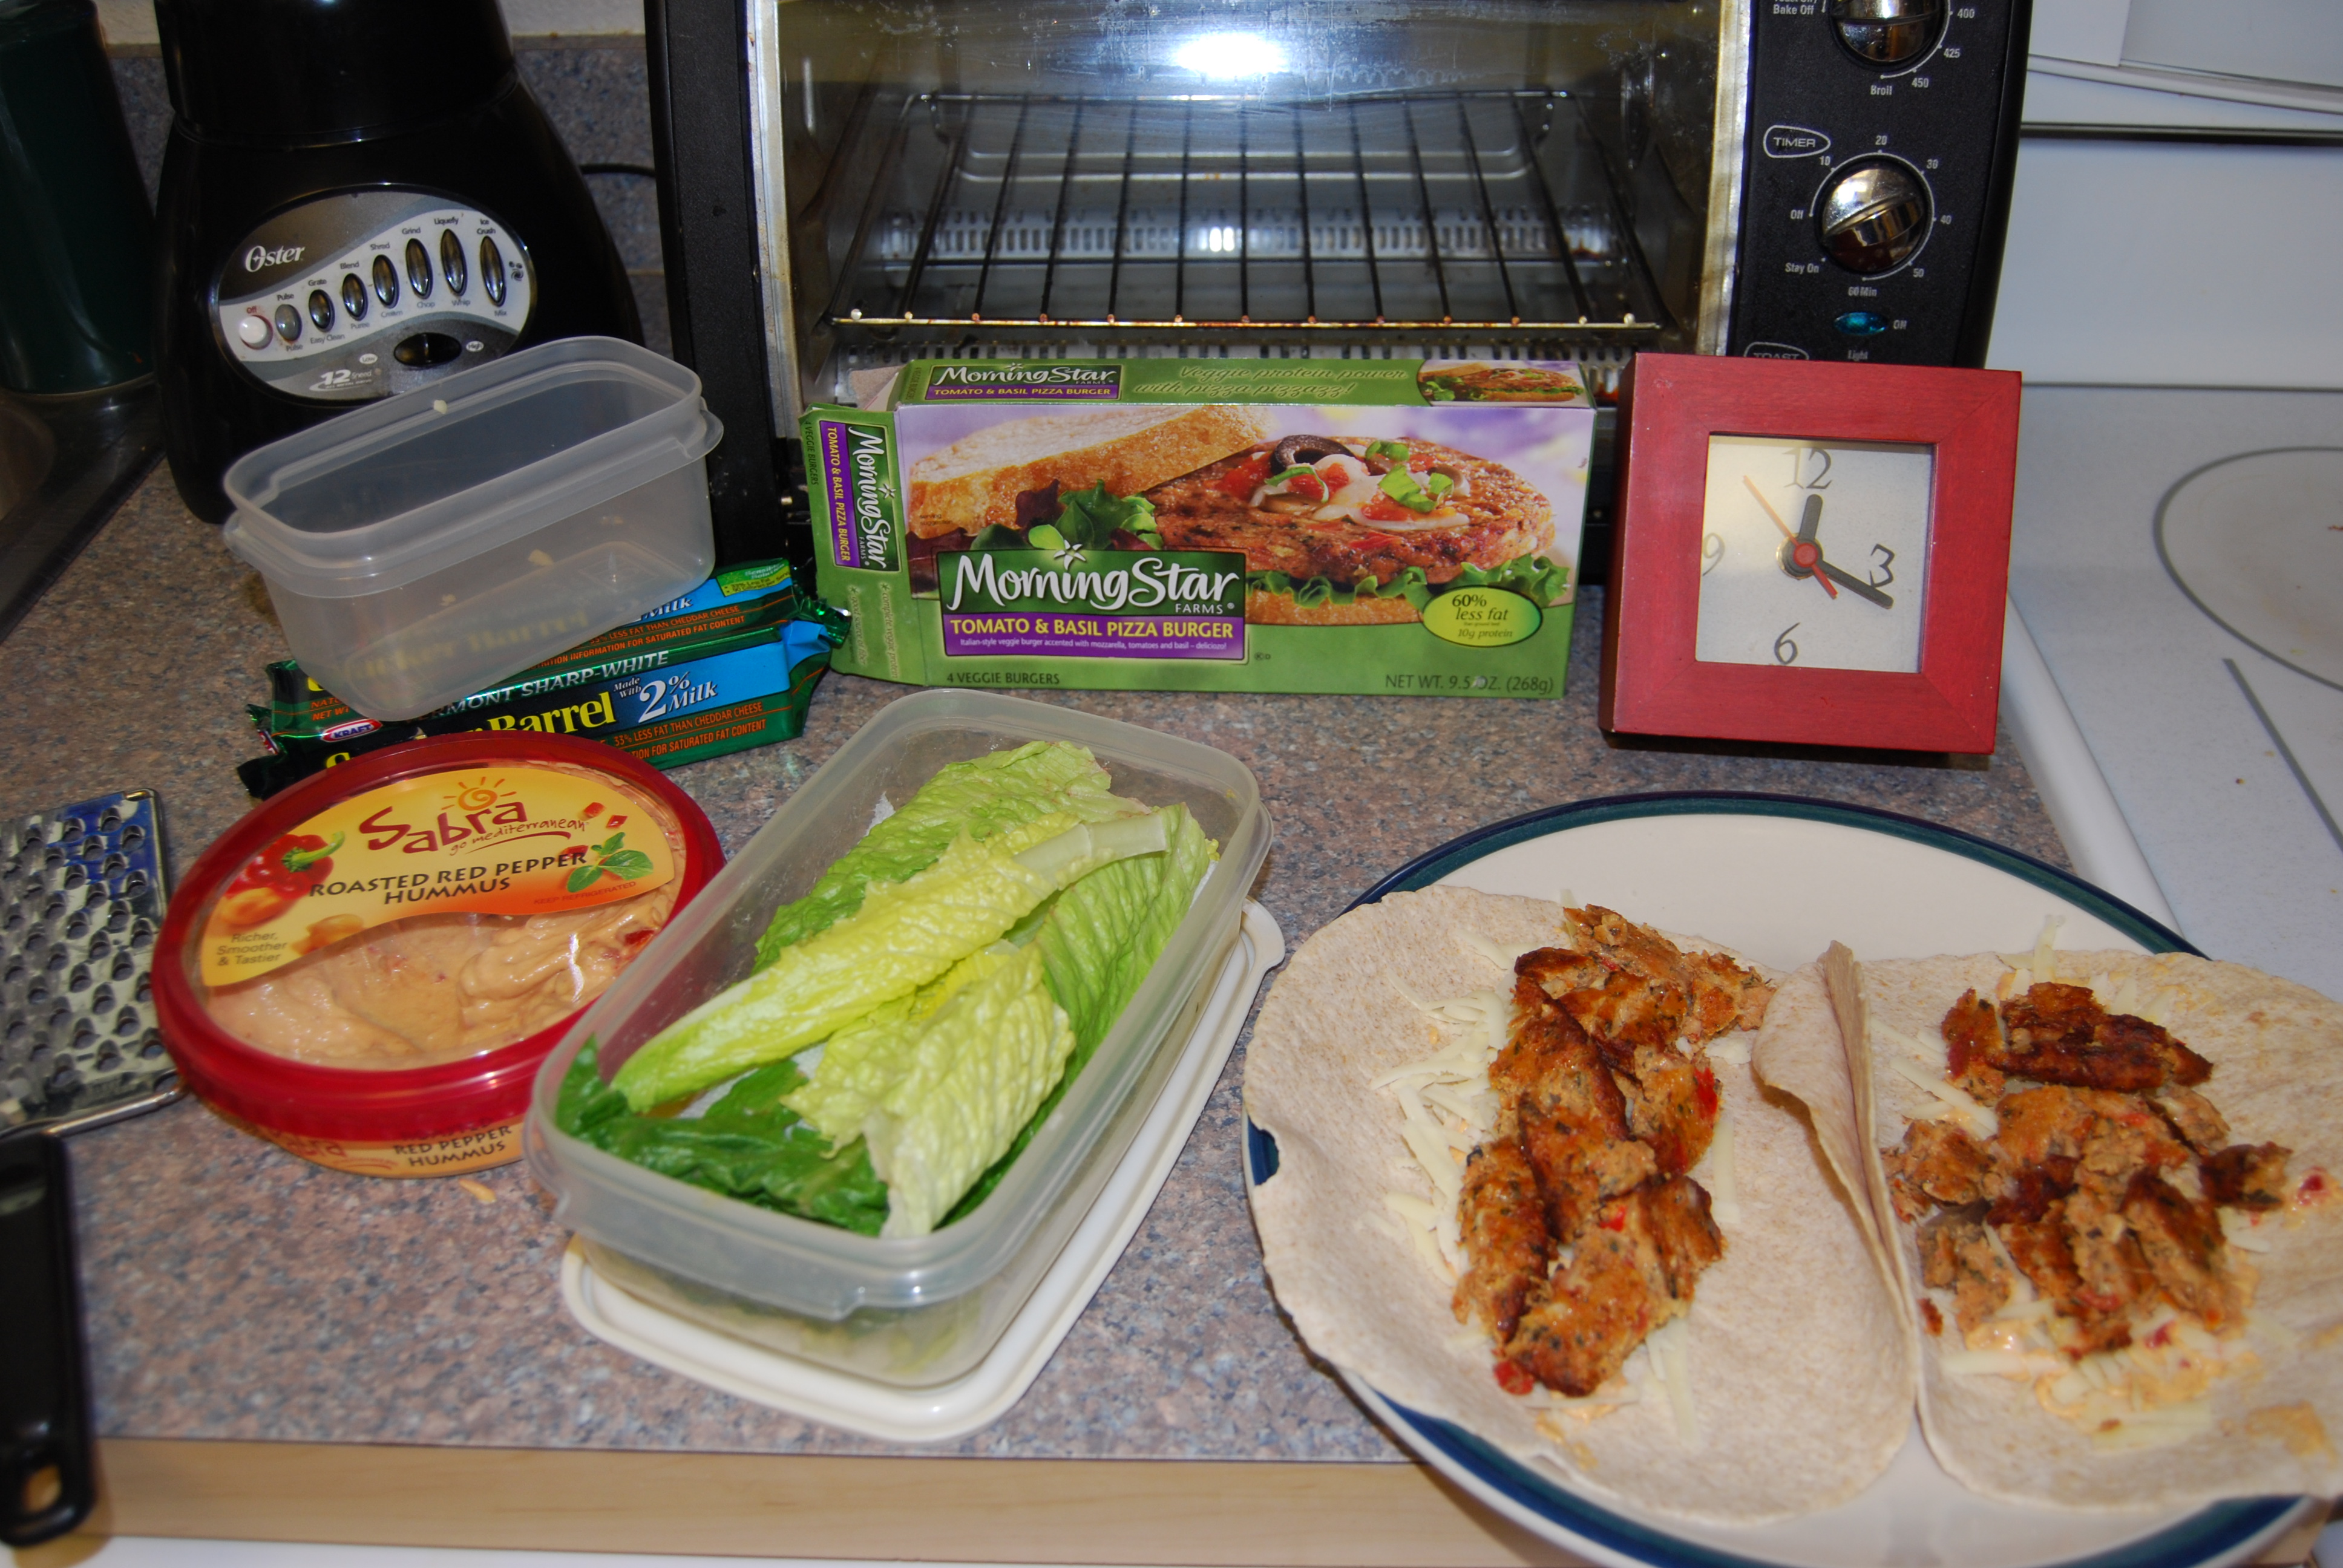
Ingredients:
1 or 2 MorningStar Veggie Patties (depending on how hungry you are)
2 flour tortillas
1 t0 2 tbsp Hummus (my favorite is Sabra Supremely Spicy)
1 oz shredded cheese (my favorite is Cracker Barrel 2% Sharp White Cheddar)
a handful of shredded lettuce (or fresh spinach)
Directions:
On a small microwavable plate, nuke the MorningStar Patties for 1 minute.
Lay two tortillas side by side on a large microwavable plate.
Spread Hummus on each tortilla.
Add the shredded cheese.
Remove the cooked patties from microwave, cut into pieces and place on top of shredded cheese.
If desired, nuke for about 15 seconds to melt the cheese.
Add the lettuce and roll the tortillas.
DONE!
The last time I made these, I took some photos. Take a look!
Variations:
These photos show the Tomato and Basil Pizza Burger, but I my favorite is the MorningStar Black Bean patties. Use different flavors of hummus and cheese too. There are so many more combinations!
I LOVE Panera Bread Salads! I was quite distraught when the Orchard Harvest Salad (photo) disappeared from the menu. I’m hoping it will be back next winter.
These days I’m ordering the Fuji Apple Salad or the Fandango with chicken, neither one being my favorite. My FAVORITE summer salad is the Strawberry Poppyseed & Chicken Salad. (Ingredients and Nutritional Info)
Problem. These salads are too expensive to buy every day. And I kinda want one EVERY day. So . . .
I’m experimenting and making my own Panera Wannabe Salads! Here’s the latest version:
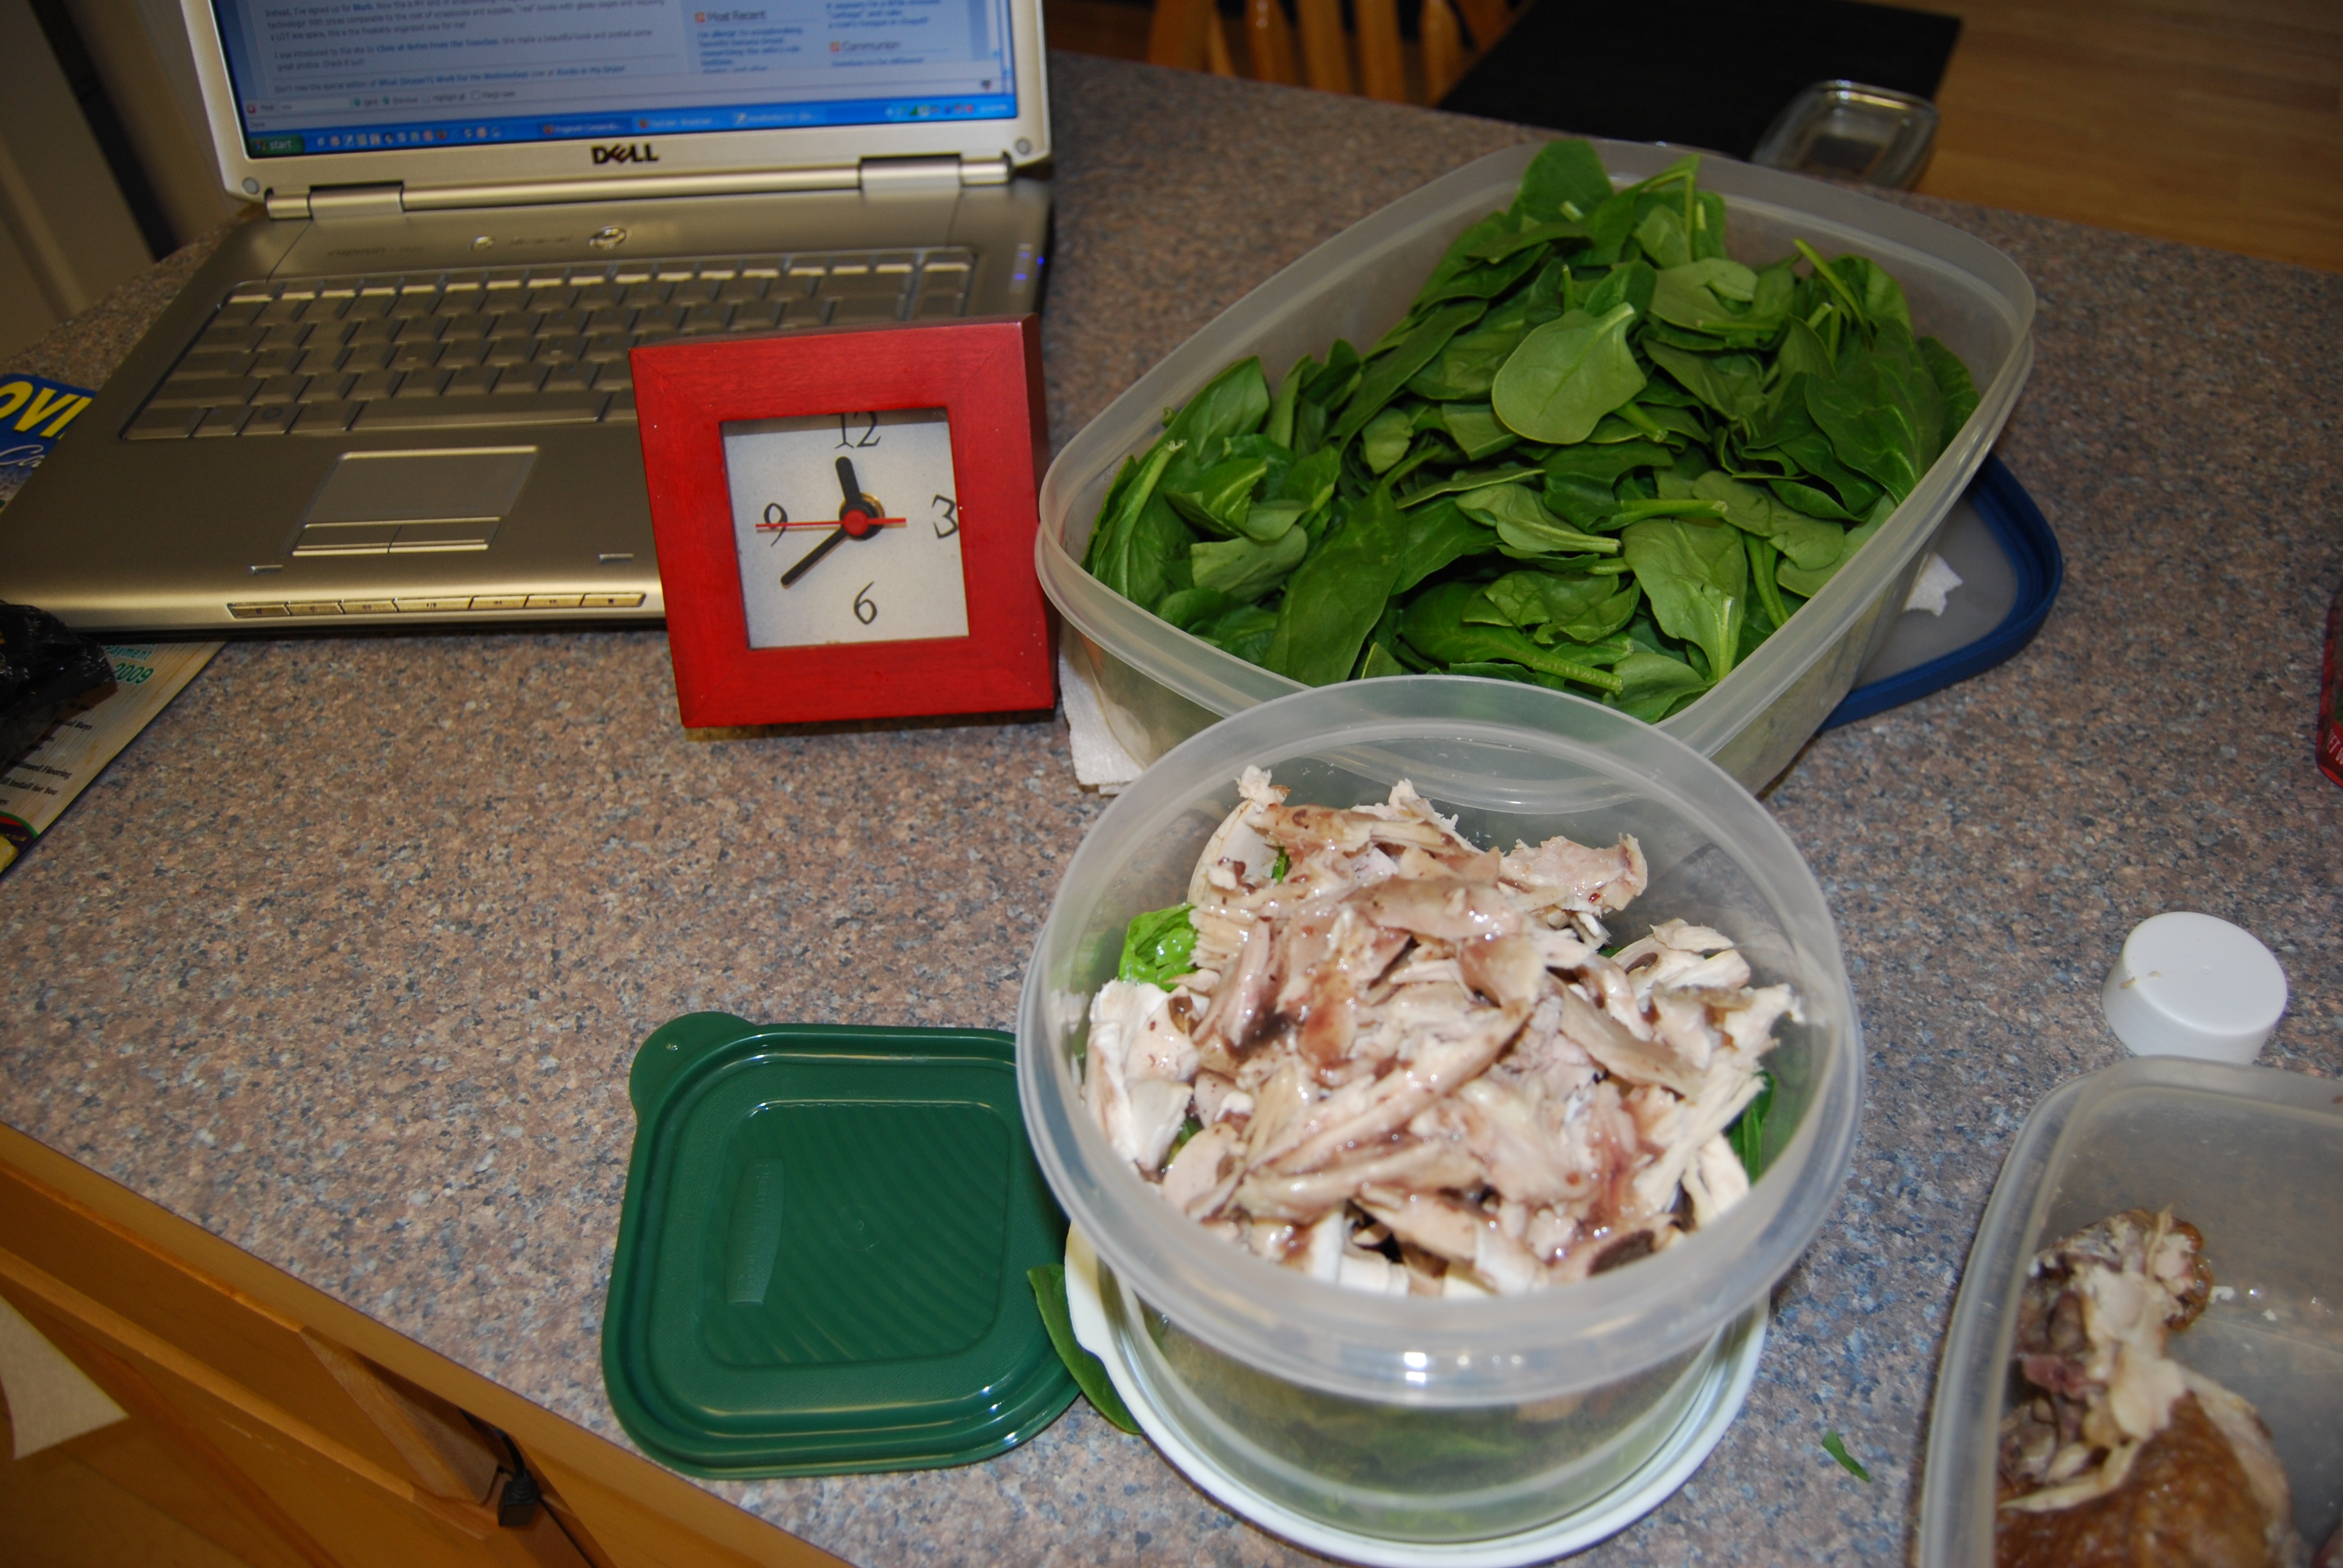
(Realize the “5 minute” part only works because I clean and prep veggies before I put them away. If I put shrink wrapped and unprepared veggies in the fridge right when I get home from the grocery store, I sacrifice them all to the mold gods a week later and give them an honorable burial in a big, black bag. I’ll write about it in more detail some other day (UPDATE: CLICK HERE for that post complete with photos), but what you see in the photo is a good representation of how I store veggies in the fridge. Notice all the containers filled with food are NOT round. I have an aversion to round containers for storage. They waste space! The round container is what I use as a salad shaker to completely coat my salad with a minimal amount of dressing.)
I just layer the salad ingredients in the round bowl. For this salad, I used:
Romain Lettuce
Fresh Spinach Leaves
Sliced Mushrooms
Pecans (small hand full)
Dried Cranberries (small hand full)
Cooked Chicken, torn from the bone (this was a Publix Deli Chicken – Apple Blossom Flavor)
Newman’s Own Light Raspberry and Walnut Vinaigrette
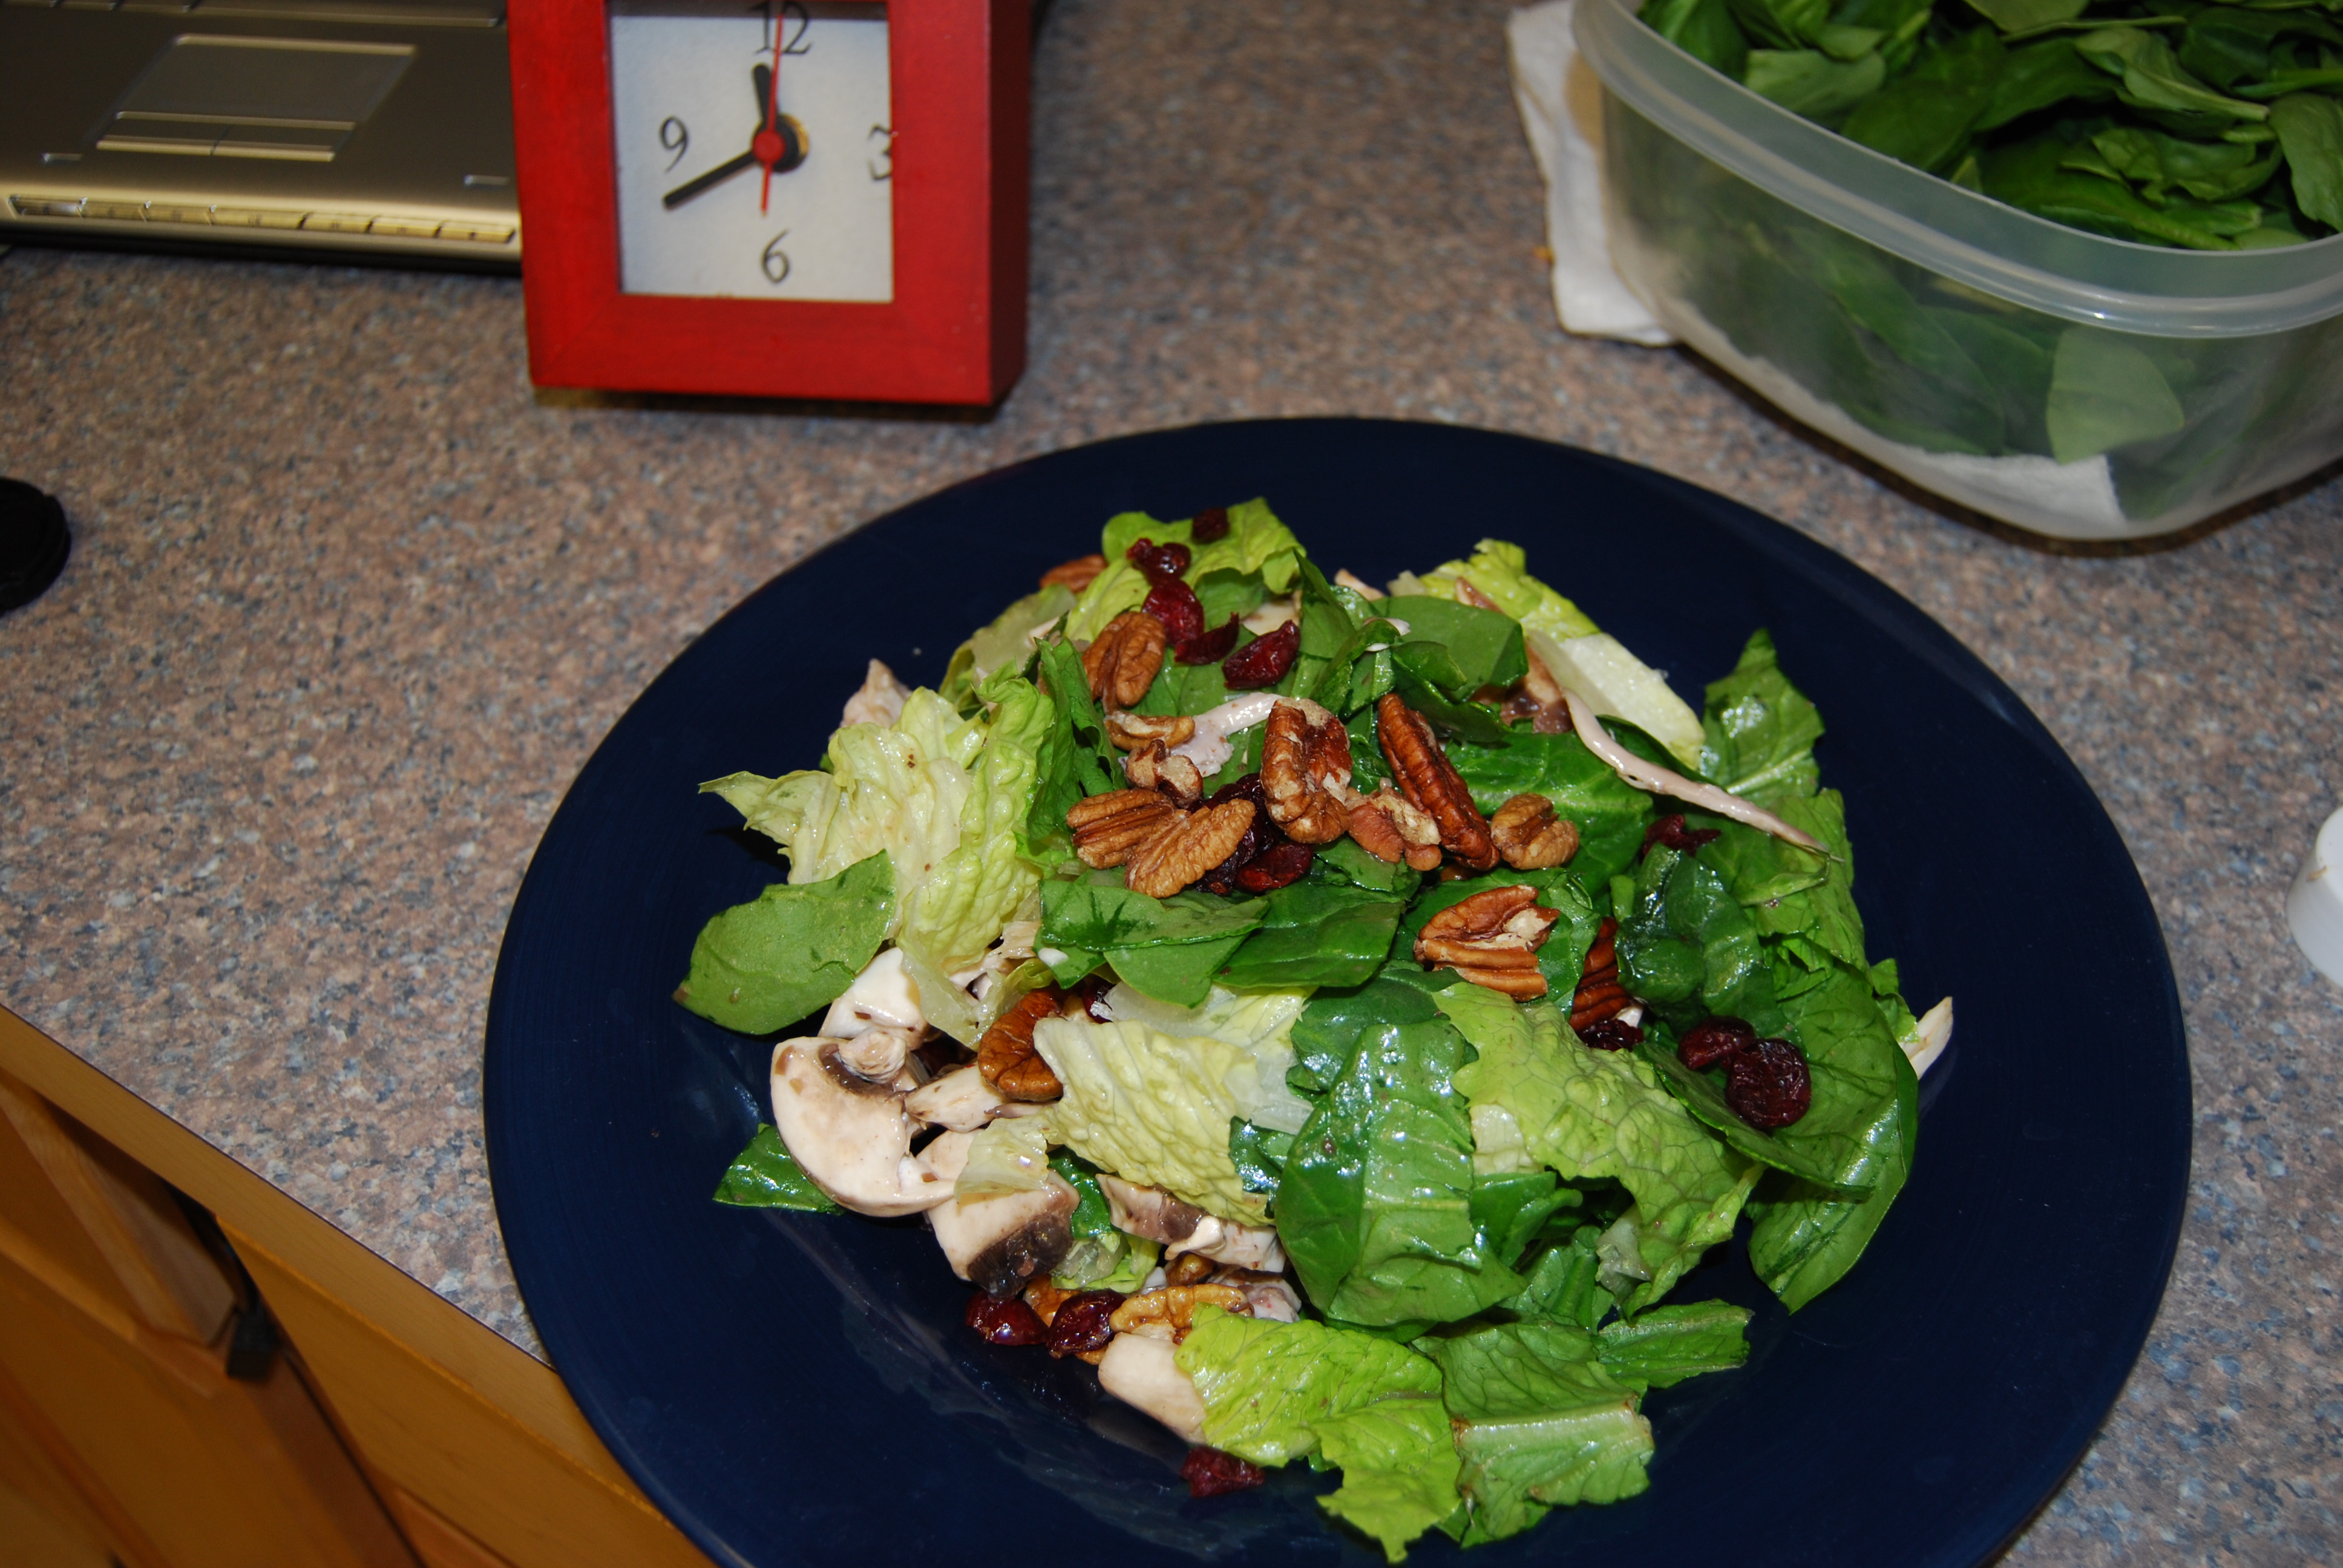
I put the lid on the round container and give it some serious shaking, take off the lid, put a pretty plate on top of the container and FLIP! (That’s why I use a round shaker.) Here’s what I got this time:
If you’re a guy, feel free to eat it directly out of the plastic bowl while leaning over the sink. 🙂
This week, the “Spring Mix” lettuce in a bag was on sale, buy one get one free, so I’ll definitely be inventing even more Wannabe Salads! And saving more money!
My kids LOVE this! (and have been nagging me to bake some for two days.)
Ingredients:
1 cup mashed ripe bananas (about 2 large)
1/2 cup sugar (I use half brown sugar)
1/3 cup liquid vegetable oil margarine (I use Smart Balance margarine)
2 egg whites
1/3 cup skim milk
1 1/4 cups all purpose flour (I use half whole wheat flour)
1 cup Quaker Oat Bran cereal, uncooked
2 teaspoons backing powder
1/2 teaspoon baking soda
Directions:
Heat oven to 350.
Spray loaf pan with cooking spray or oil lightly.
Combine bananas, sugar, margarine, egg whites and milk and mix well.
In a separate bowl, combine flour, oat bran, baking powder and baking soda.
Slowly pour dry ingredients into the banana mixture and stir just until moistened.
Pour batter into prepared pan.
Bake at 55 to 60 minutes or until toothpick inserted in center comes out clean.
Cool 10 minutes in the pan; remove to wire rack.
Cool completely.
Nutritional Info: (for 1/16 of a loaf)
(before my modifications to the recipe)
Calories 130
Protein 3 g
Carbohydrate 20 g
Fat 4 g
Fiber 1 g
Another tip? When bananas start to get soft in our house, I toss them into the freezer, skin and all. Then, when I make banana bread, I put the frozen bananas in a bowl and fill it with warm water a few times. When the bananas are thawed, I tear off the tip of the skin and “squeeze” the banana out like toothpaste. PERFECT for making banana bread and no wasted bananas!
I almost always make three or four loaves at one time. The mess is already there, the ingredients are already out and the oven is already hot – so why not? It freezes VERY well, sliced or whole!
I mentioned before – I LOVE my Vidalia Chop Wizard! Last time I showcased this wonderful little gadget, someone commented that they were surprised that it could handle tougher veggies, like onions and carrots, so I thought I’d show how the chop wizard handles onions. Notice that I’m using the smaller chopping grate this time and check out the time on the little red clock.
Again, I PROMISE you – I did NOT touch that little red clock! I just LOVE this thing! Chopped onions really are a breeze!
But you probably noticed I didn’t finish all three onions. I actually filled up the chop wizard and had to stop to complete my “onion chopping ritual,” so I thought I’d go ahead and include it in this post as well. I usually chop onions in bulk to freeze, but I only had three today. Here’s what I do:
I chop all the onions I’ve got, either using the chop wizard OR, when I’m really in a hurry, I use my Oster food processor attachment. (I have a 1990 Oster Kitchen Center, but for smaller jobs, I keep my 2003 Oster blender on the counter because it takes most of the same attachments. Isn’t it cool that the attachments are interchangeable?) Anyway, I had an extra 5 minutes today and I really prefer the onions chopped in nice little squares – they’re just prettier than the shredded onion that the food processor produces.
Then, I lay out the chopped onions on a large metal cookie sheet for flash freezing. Flash freezing refers to the freezing technique where you lay out something individually, best on a metal cookie sheet (it gets colder much faster than a cutting board), and freeze it quickly. It keeps the food from sticking together in a big frozen ball of goo. REALLY great for freezing any kind of berry!
Then, I sit here for about a half an hour and write this post. (besides, I need my coffee.) I usually leave the onions in longer because I forget about them. If you can leave them for an hour or two, that’s actually better. I once left them in overnight with no problems. At a minimum, you want ice crystals to form.
When the onions are frozen, I move them from the cookie sheet into something better for freezer storage, such as a Ziploc bag. I stack the bags in the freezer and because they are flat, they take up very little space. (I was going to include a photo of the frozen onions on the cookie sheet, but you can’t see the ice crystals, so it just looks the same as the pre-frozen cookie sheet photo.)
Later, when a recipe calls for onion, I’m ready! They defrost really fast! I leave the bag on the counter for a few minutes and when I take the slab of onion out of the the Ziploc, it just crumbles.






 ” and I didn’t see “Fruit Stuffed Pork Roll” in the table of contents, so it appears it was altered for the show. That is FINE with me. It turned out great!