Although we used “real” pumpkin for our jack-o-bread recipe, we use canned pumpkin for this. It’s much smoother – not so . . . grainy, if you know what I mean.
FavoriteSon has been begging/nagging for days and Sunday night, FirstHusband finally made the long awaited jack-o-bread. It’s pumpkin bread made from our jack-o-lanterns.
First, PinkGirl scooped pumpkin guts on Halloween. (If you carve your jack-o-lanterns too early, you may want to use canned pumpkin.)
Then, the pumpkin gut fairy cleaned up.
FirstHusband/BestDaddy cut up the jack-o-lanterns the next day. (You’ve got to move fast on this, the inside of the second pumpkin started to rot the next day.)
Poor “Jack” was boiled like potatoes. [UPDATE: We now bake him at 350° until he’s tender.]
My copy of “The Tightwad Gazette” was opened to the wrinkliest page – the one with the highlighted pumpkin bread recipe.
FirstHusband did the honors.
And it appears I’m too slow with the camera.
A number of years ago, I insanely – and I do mean INSANELY – made four batches of pumpkin bread – from FOUR different recipes. It took me ALL day and I forgot to wear shoes, so my back and legs and feet were KILLING me when the last oven timer went off. But at the end of the day, the taste tests revealed the winner was a recipe from “The Tightwad Gazette” by Amy Dacyczyn (pronounced “decision”). The recipe is in the original book, page 127. There’s a The Tightwad Gazette II and a The Tightwad Gazette III. Now there’s even The Complete Tightwad Gazette
3 eggs
4 cups sugar (we use half brown sugar/half white sugar)*
1 cup oil
1 16oz can pumpkin (we use 16 oz of “Jack”)
5 cups flour (we use half wheat/half white flour)
2 tsp baking soda
1 tsp salt
1 1/2 Tbsp cinnamon
1 tsp allspice
1/2 Tbsp cloves or nutmeg
1 cup applesauce (we use sugar-free)
You can add:
1/2 to 1 cup chopped nuts
1 cup dates or raisins
I’ve already posted my contribution for Kitchen Tip Tuesdays for this week, but Tammy asked for other ways to dice carrots, so . . .
or
I did need to cut the carrot in half to fit on the grate and the smaller grate needed extra pressure, but it worked great – as usual! I’ve posted before about what my Vidalia Chop Wizard! can do.
Back in March, I posted a recipe for Bake Ahead Egg Muffins (with a print friendly PDF version). The Sunday before last, I took about 20 to 30 minutes to whip up a batch of egg/cheese/spinach/sausage goo – but I didn’t bake muffins. I baked two 9×12 pans and then cut squares. The squares fit nicely on a piece of toast.
This week, I again used the two 9×12 pans, but I used an empty (and clean) tuna can to cut circles to fit on an English muffin. I punched a hole in the bottom of the tuna can because I cut them hot and there was sputtering when I pressed down. I layered the patties between paper towels in containers to prevent sogginess and FavoriteSon had the first one this morning. Score! We now have 14 more patties in the fridge. Along with the leftover remnants after cutting all those circles.
Me? I put the remnants on a piece of toast. Such a visual example the wasted space resulting from round containers. I’ll say it again. I HATE round containers.
If you’re just catching up, we’ve been on a quest to decipher the missing ingredient from FirstHusband’s handwritten one pot hit recipe. To see the entire recipe, check out “guess (or suggest) the missing ingredients, win a cookbook.” To read about our clues and continued thought process, check out “It’s a Cook-Off!” We’ve had LOTS of guesses and suggestions, none of which really seemed just right.
But I got to thinking about it. FavoriteSon LOVED it. Loved it? It had tomatoes in it. Spinach. Chick peas? big whoop. What would make FavoriteSon – my little carnivore – LOVE it?
Meat.
I typically buy and keep one of the following on hand almost all the time:
Healthy Choice Smoked Turkey Sausage.
or Oscar Mayer Smoked Sausage
or Bryan Smoked Sausage
So am I right? I have no idea. But when I mentioned it to FirstHusband, he relied: “Could be, I’ll give it a try.”
It sure would explain why FavoriteSon loved it.
So, this is the first version we’ll try and I’ll let you know how it turns out. But, DON’T LET THIS STOP YOU from making additional suggestions! I’m not sure I’m right. It’s just a guess.
This is a follow-up from my previous entry at Kitchen Tip Tuesday hosted by Tammy’s Recipes. Go on over and check out the great tips and recipes!
I noted in number 5 of my “21 things about me” that I can only cook with a recipe. In contrast, FirstHusband cooks like a mad scientist – he invents. Sometimes the results are . . . disappointing. Like Fish Grits. (He wouldn’t even eat them.)
Many times, the invention turns out to be very, very good. Sometimes it’s “You should become a chef after your mid-life crisis” good. When that happens, there’s always a plea for him to write down what he did so he might possibly be able to repeat it. A while ago, he created a one pot meal that we all loved and he did write down the ingredients. Unfortunately, is seems an engineer’s handwriting is worse than a doctor’s. Check it out. (Click on the photo to see a larger image.)
Can you guess the ingredients? There are twelve lines here. I’ve figured out all but one, but I don’t want to spoil the game, so I’ll only reveal a couple of the easy ones.
1. white wine/sherry
2. (UPDATE – Correct! 3 chicken breasts, cut up)
3. one box spinach
4. (UPDATE – Correct! 1 can of tomatoes)
5. (UPDATE – Correct! 1 can of chickpeas)
6. THIS IS THE ONE THAT I STILL CAN’T FIGURE OUT! Make a guess or a suggestion!
7. (UPDATE – Correct! 1 can of cream of mushroom soup)
8. (UPDATE – Correct! 1 can of cream of celery soup)
9. boil (UPDATE – I’ve been corrected! It is BASIL.)
10. rosemary garlic (seasoning – we have a big Sam’s Club jar of it.)
11.
12. garlic (we keep a jar of minced garlic in the fridge.)
And this is a game after all, so there needs to be a prize. How about a cookbook? It was Whale of a Sale this past weekend, so I picked up a few gently used cookbooks to choose from. Click on the links to read the Amazon descriptions.
If you play the “missing ingredient” game, specify your book choice in your comment.
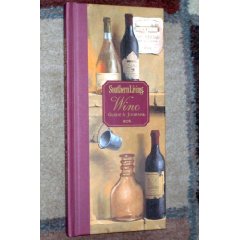
Instead of a cookbook, a shrink wrapped hardback copy of the Southern Living Wine Guide and Journal
Enter to win by commenting and guessing a missing ingredient. OR SUGGEST a possible ingredient for #6! Depending on the response, I might fill some in as they are correctly guessed or I might wait a week. Either way, I’ll randomly pick a winner on Tuesday, October 14th, so check back!
Shannon, over at Rocks in My Dryer is hosting a themed edition of Works for Me Wednesday. Today is all about kitchen organization! Since it’s Whale of a Sale time and I’m sorting hundreds of books and alphabetizing by author until I literally can’t remember how to spell, I’m maximizing my time (cheating) and highlighting previous posts about my kitchen.
AND, Shannon’s theme has also prompted me to organize my “recipes” page, above. It was missing quite a few posts but now – I think – it is up to date! Just in time for Thanksgiving pumpkin soup!
What is FavoriteSon’s favorite school lunch these days?
Cold pizza.
The “take and bake” Walmart pizzas for $8.00 are an easy way to go on this one. We bake the pizza on Sunday, cut it up into 10 pieces and FavoriteSon packs 2 slices in his lunch every day. Of course, since he’s 13, that’s not ALL he takes for lunch, but it’s a good start.
This week, he talked me into taking him (and his sister) to American Pie for dinner while FirstHusband was on travel, so he’s eating Amercian Pie leftovers for the next few days. That wasn’t $8.00.
Posting this tip was FavoriteSon’s idea. Good job, bud.
Way back in May, in a post entitled “5 minute Panera Wannabe Salad,” I mentioned that I stored veggies pre-prepped and that I would post more on it someday. It is someday.
This idea was an accident. It was January of 2008. Mexican night. The table was covered with lots and lots of small bowls with “fixins” like diced tomatoes, shredded lettuce, chopped onions, diced red bell pepper and of course shredded cheese, salsa, queso and more. At cleanup time, we put everything into individual Rubbermaid containers and piled them in the fridge.
The next night, we had salad with dinner and pulled out all the little containers to add the fixins to our salad. At cleanup time, the lids went back on and everything went back into the fridge. THAT was easy! We liked the convenience so much we decided to add some other pre-prepped veggies into the mix for future salad building. Soon we had individual containers of (raw) broccoli florets, cauliflower florets, red, yellow and green diced bell peppers, scallions, carrots, mushrooms – we went all out.
The problem was that when we tried to get something from the fridge, these little individual containers would fall over and out onto the floor. (Is this the underwear principle at work or what?)
Here were the pros:
We liked that we didn’t have to prep veggies every time we wanted to eat them. Sure veggie prep took longer, but that’s because we were prepping about a week’s worth at a time! Far less than the cumulative time it took before – and we didn’t have to wash the Chop Wizard so often!
We were eating more fresh veggies because it was so flippin EASY.
The individual containers took up less room than un-prepped veggies because we were no longer storing the veggie parts we don’t eat.
Unlike shrink wrapped broccoli or a bag of bell peppers, the containers were STACKABLE.
With small, individual containers, we only grabbed the veggies we wanted. (I had originally considered a multi compartment veggie tray with a lid – but we would have to take the entire thing out even if we only wanted one thing. Besides. They were all round.)
The veggies were staying fresh longer because we were lining and layering the containers with dry paper towels. (Amazing discovery! Works great with mushrooms, lettuce and fresh spinach!)
We were no longer sacrificing still packaged but rotten veggies to the mold gods every week.
No more dry heaves while cleaning out the fridge. (The “what was this?” fridge cleaning game is rarely played in our house anymore.)
Now the cons:
We had to prep veggies. (Unfortunately, since we don’t want to pay for pre-prepped veggies, we weren’t going to get around this one.)
The individual containers were getting knocked over and falling out of the fridge way too easily.
There was a problem with our “system.”
So, as I mentioned, I shopped/researched what container solutions were available. I finally settled on an unused rectangular plastic box I happened to have. It was the perfect height and depth. I packed it with all the individual containers. Again. Perfect. It’s been working for nearly a year. We can either remove one or two containers or we can slide the box all the way out of the fridge like a drawer. The actual veggies and individual containers change all the time, but the are always stored in the veggie box. And yes. Those are actually oblong containers not square or rectangle, but they work in the veggie box, so they may stay.
We’ve also added two large rectangular containers to sit alongside the veggie box. One with a romaine mix and one with fresh spinach. The photos below only show one – we were out of romaine.
UPDATE: (Inspired by Endless Freebies comment below.)
The photos may be misleading. They only show one configuration of the box. We usually use the smallest containers we can and when space is needed for more veggies, we size down as we use the contents. And we have multiple sizes and shapes!
With regard to the box size – that was a process. (Like I said, The Underwear Principle at work!) We tried a smaller veggie box size, but we had a few problems:
1. When the depth of the box didn’t equal the depth of the fridge we had wasted space behind or in front of it. (Wasted space? Not on my watch.) We tried pushing the box to the back and using the extra space in front for other things, but we HATED moving the stuff to get to the box. Storing anything behind the box? We would forget about it and have to play the “What WAS that?” fridge game later.
2. We tried a shorter box and storing it on an adjustable shelf, but we had too many veggies and needed to stack. When we did, stuff fell out because the sides of the box were too short.
3. The day the above photo was taken, the veggie box wasn’t full. We didn’t have any onions or scallions and only one color bell pepper. Sometimes we have shredded carrots, asparagus, avocado, diced or sliced tomatoes, sliced zucchini or squash – LOTS of choices. So while a smaller box would have worked THAT day, it doesn’t work every day.
I eat a fair amount of salad and we use LOTS of spinach, so the big rectangular containers along the side work out the best for us. (We put fresh spinach in LOTS of things – especially omelets!)
I’m charging the camera battery right now, but later I’ll take another photo of TODAY’s configuration as a comparison.
In a recent post, “have camera, will swaddle” I asked for “easy, healthy, not too expensive and nursing mom/baby friendly meals” to take to my sister and her hubs over the next few weeks. Memarie Lane‘s idea to “throw some boneless pork or chicken in the crockpot with a bottle of barbecue sauce, shred it, and serve it on sandwich rolls” sounds perfect, but I admit – I’ve never shredded meat before. Didn’t have a clue. Do I need a knife? Seems like the pieces would be too big. A food processor? Seems like I would end up with pâté. or meat pudding.
So, I Googled.
I found two methods to shred meat. Both were found on Expert Village.


 ” by Amy Dacyczyn (pronounced “decision”). The recipe is in the original book, page 127. There’s a
  and a
and a  . Now there’s even
 . They make
  too!
too!